Subscribe to my YouTube Channel The Rusted Garden
Over 800 Garden Videos Designed to Quickly Present Information!
Please Support The Rusted Garden by Shopping through my Amazon Affiliate Link
Please Support The Rusted Garden by Shopping through my Amazon Affiliate Link
How to Grow Tomatoes in an 18 Gallon Storage Container
This method of container gardening
will work for any vegetable. The key to container gardening is matching
the size of the container to the watering needs and full growth of the vegetable plants.
A vegetable plant left in the sun, in a container that is to small,
will dry out. No matter how vigilant you are with your watering, a day
will come when the container drys completely out. This only needs to
occur once and the health and productivity of your vegetable plant is
severely effected. This is very true for tomato plants. Watering and maintaining moisture is the key to
successful container gardening. Fertilizing and maintaining your plant
comes second.
Using an 18 gallon or similar storage
container to grow you plants may not be as attractive as using a clay or
fancy pot but it is by no means ugly. What you sacrifice in the way of
the round more attractive containers, you gain back 10 fold in the
productivity and health of your tomato and vegetable plants.
The Supplies
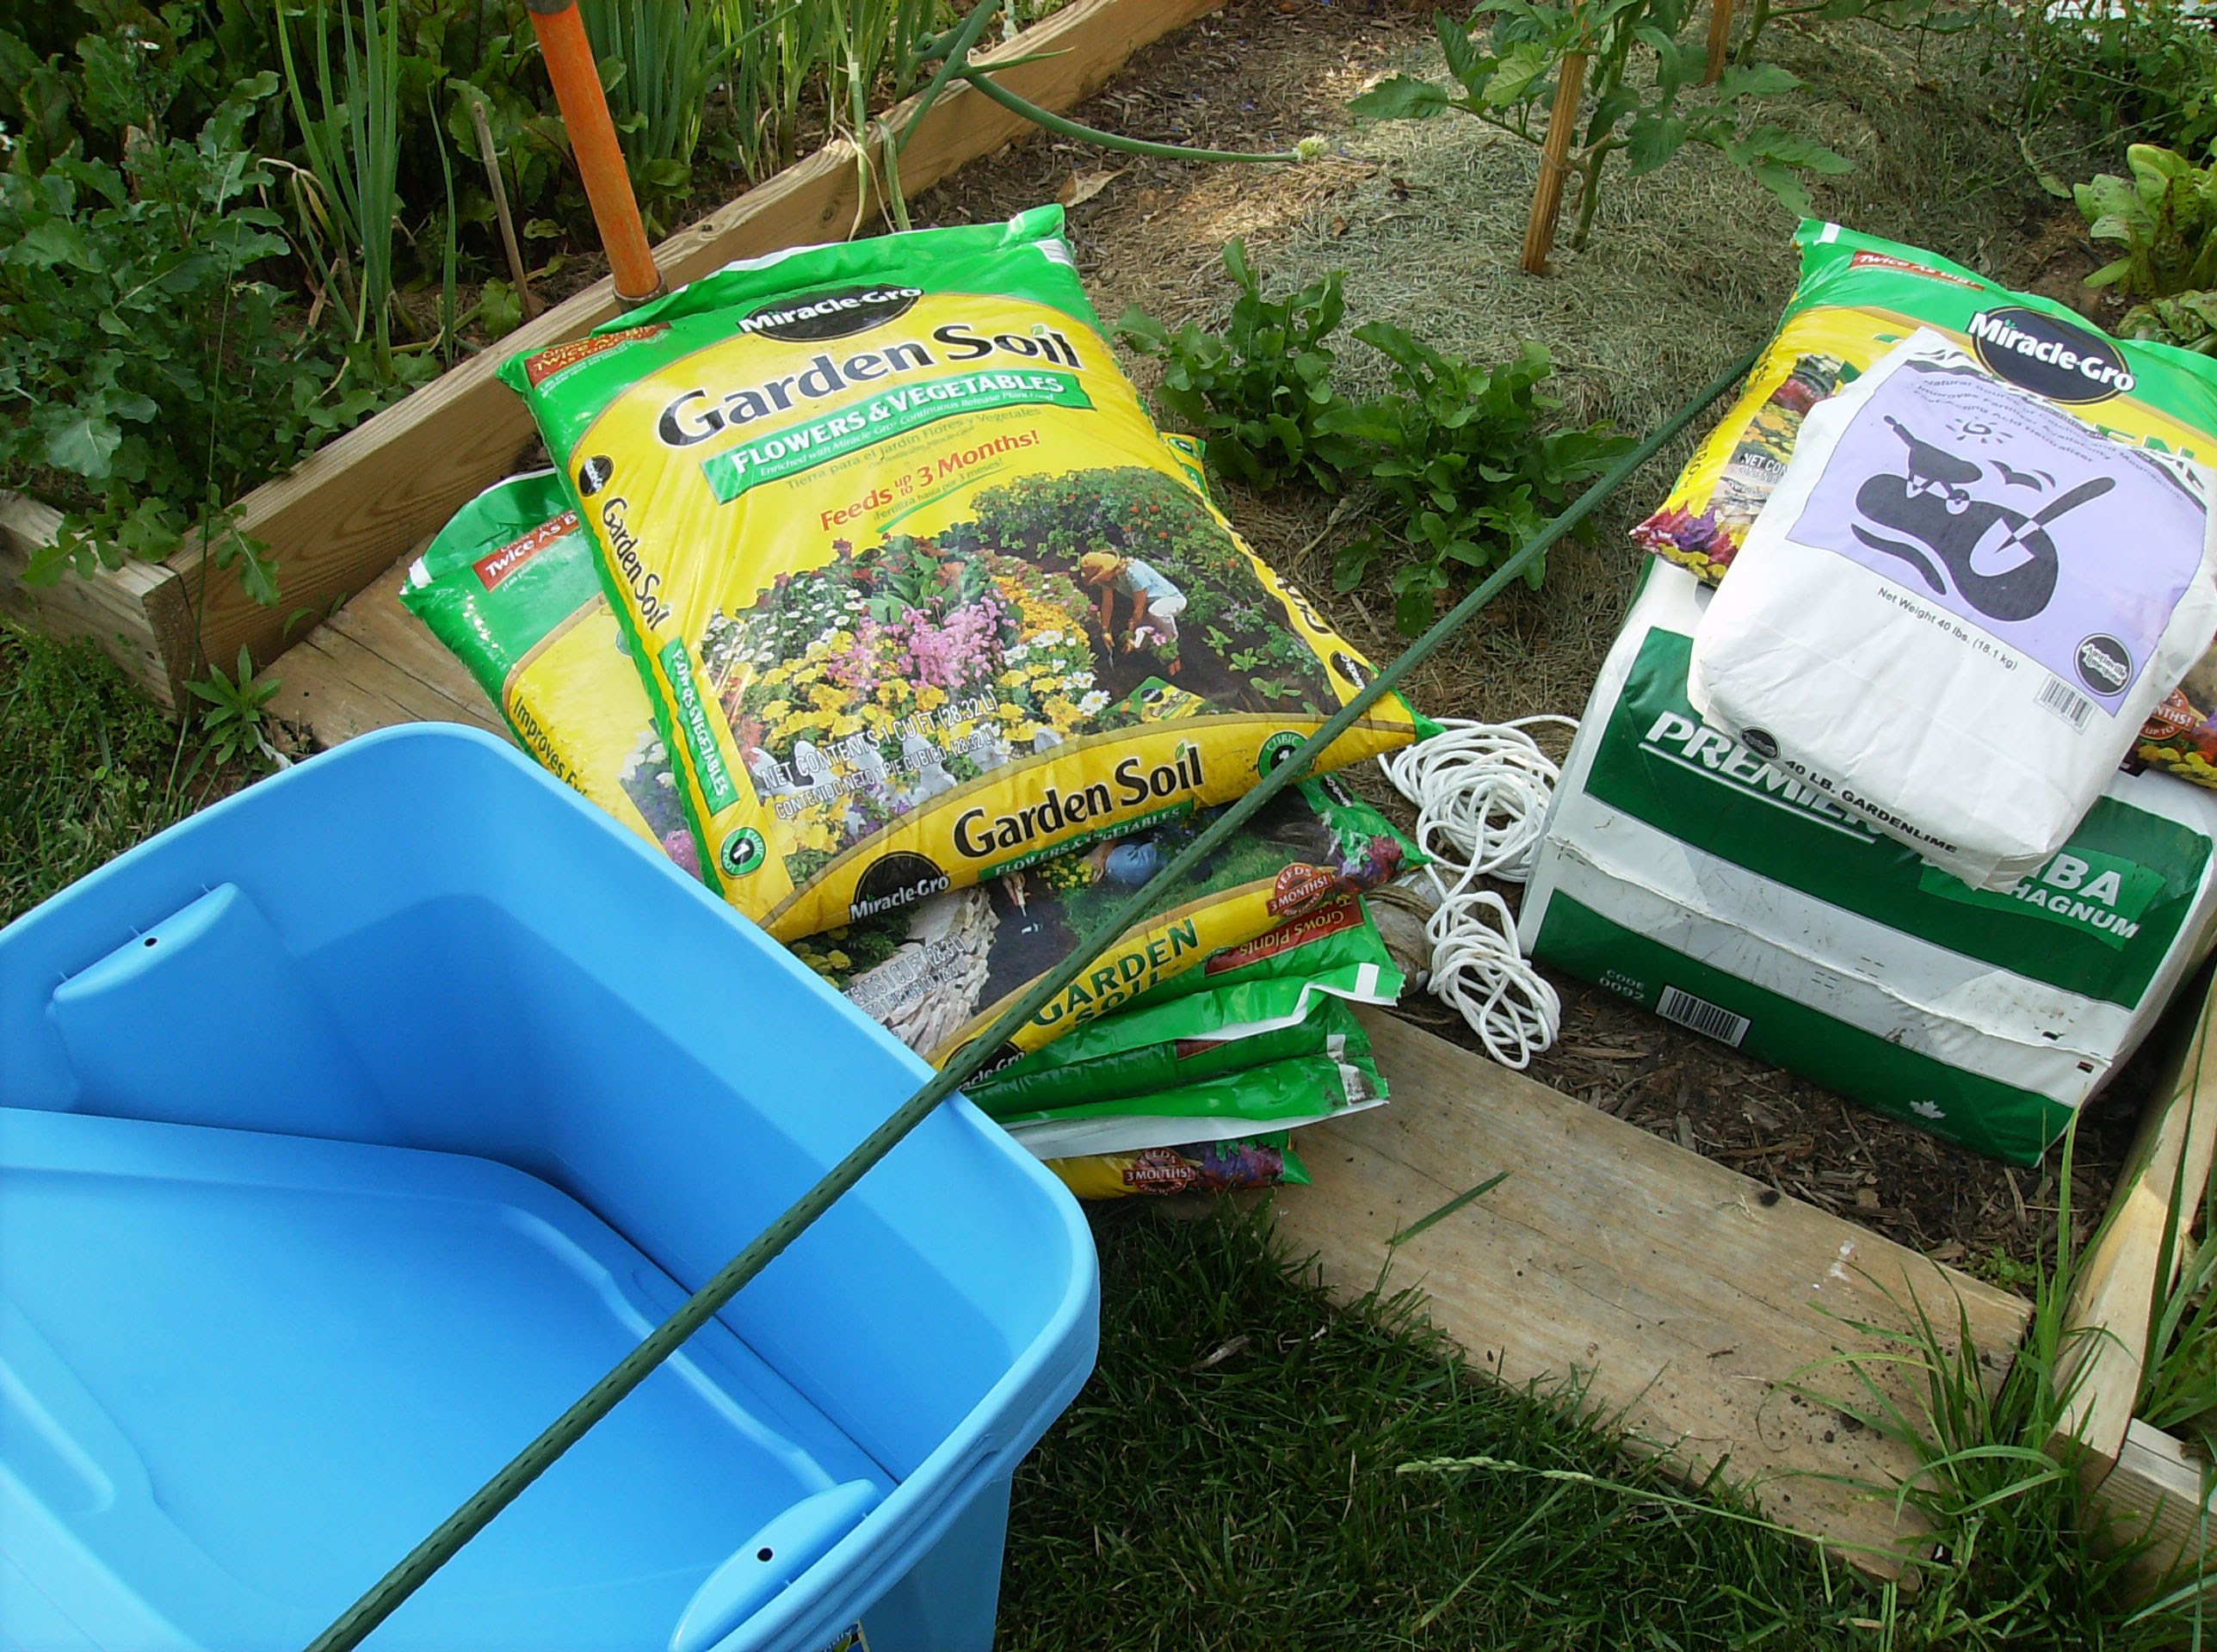 |
| 18 Gallon Container Gardening: The Supplies |
- An 18 gallon storage container
- 2 cubic feet of garden soil per 18 gallon container
- A bail of sphagnum peat moss (the above pictured size will be enough for 10 containers)
- A bag of 10-10-10 fertilizer (the standard 40 pound bag will meet all your summer container needs)
- A bag of pulverized lime (the standard 40 pound bag will meet all your summer container needs)
- A six foot stake for tomatoes or other plants that need staking
- A tape measure
- A knife
- Plants of your choice
These are the essential supplies. You can plant other
vegetables in this type of container. Just keep in mind the size of the
plant when it is mature. You don’t want to create an over crowding
problem.
*If you want to keep the soil simple, just buy bags of moisture control garden soil. You can just fill that container with that and skip the PEAT MOSS and LIME steps. It isn't needed if you buy moisture control garden soils. I just do extra work sometimes.
Preparing the Container
Measure two inches from bottom on both
sides of the container that contain the handles. Using a blade, cut a
square hole on each side of the container at the two inch mark.Once that is done the
container is prepared.
Many containers traditionally have either
no holes for drainage or have a hole on the bottom of the container for
drainage. The method I describe uses a hole 2 inches from the
container’s bottom. Water will occasionally sit in the bottom of the
container. This will not cause a problem. You have drainage holes to
prevent more then a two inch build up of water. You want to have that
reservoir. The soil you are mixing will suck this water up quickly. This
is a strategy to maintain moisture in your soil during the hot days of summer.
 |
| 18 Gallon Container Gardening: Preparing the Container |
Preparing the Soil
* Remember bags of moisture control garden soil can help you forgo the extra mixing of ingredients. I just like doing that as part of the process of relaxing in garden.
Dump 1 cubic foot of soil into the
container. Your bag of soil is probably either a 1 cubic ft. or 2 cubic
ft. bag. Sprinkle a 1/2 cup (I use an 8.5 oz Styro-Foam cup) of 10-10-10
fertilizer onto the soil. Also sprinkle a full cup of pulverized lime
onto the soil. Add three heaping spade/shovel fulls of peat moss to the
mix. Just for clarity sake your are using your large shovel not your
hand shovel. Thoroughly mix the contents of your container together
using the shovel.
Make sure the soil you buy is GARDEN SOIL
and not TOP SOIL. You can also use POTTING SOIL. I use the Miracle Grow
brand for my garden soil. I recommend using a brand that also provides 3
months of fertilizer. The plants in the container will need to be
fertilized regularly. A tomato will use up the soil nutrients quickly.
Since the soil is contained, the vegetable plants have limited space for
their root systems to search for moisture and nutrients. Once the
nutrients are gone, you will notice plants begin to yellow.
Dump 1 more cubic foot of soil into the
container. Sprinkle 1 more cup of pulverized lime onto the soil and mix
everything together. Four or five turns with your shovel is fine. The
peat moss provides extra matter to retain moisture. The pulverized lime
not only neutralizes the acidity of the peat moss but it adds calcium
and magnesium to your soil. Calcium helps prevent blossom end rot in
tomatoes.
 |
| 18 Gallon Container Gardening: Preparing the Soil |
 |
| 18 Gallon Container Gardening: Finishing the Soil/Room for Mulch |
There should be about 4 inches of space left in your container. The
four inches of space allows you to easily water your plants and it
provides space for mulching. I use grass clippings as mulch. Mulching
the top 4 inches of your container will help manage moisture. Remember
watering and moisture control is the key to successful container
planting.
Planting the Tomato
 |
| 18 Gallon Container Gardening: Planting the Tomato |
You will notice I pinched off a few branches of leaves from the
stem. In this type of container you want to get about 6-8 inches of the
root ball and stem into the hole. Tomatoes are vines. The stem the gets
buried will actually grow roots. A deeper planting will provide you
container tomato a bit more stability. The tomato will also get staked.
The tomato should be planted in the center of the container. If you
transplant is smaller then the one in the picture, plant it at 1/2 its
total height. That’s it, your done.
Tending and Maintaining Your 18 Gallon Container Garden
- Water it every other day thoroughly. On consecutive 90 degree days when the tomato or vegetables are mature, you may need to water the plants daily. Soak the container until water drips out the holes on the bottom.
- You can check your plant for moisture by poking your finger into one of the holes you cut. If the soil is dry, you should water it quickly. Don’t wait for it to dry out.
- You loaded the soil up with fertilizer when you filled the container. It should easily fertilize the plants 4 or 5 weeks. After that, I recommend 1 gallon of water soluble fertilizer weekly. Just 1 gallon.
- You should mulch up the container as soon as you can to help with moisture management.
- You will have to prune your tomato as it grows and tie it to the stake.
- I use a touch of Sevin dust for insect problems as needed. You can search the web for alternatives.
- I use an 18 gallon container because I can move it. If you have shade issues you can move the container around as the sun moves.
The Finished Product
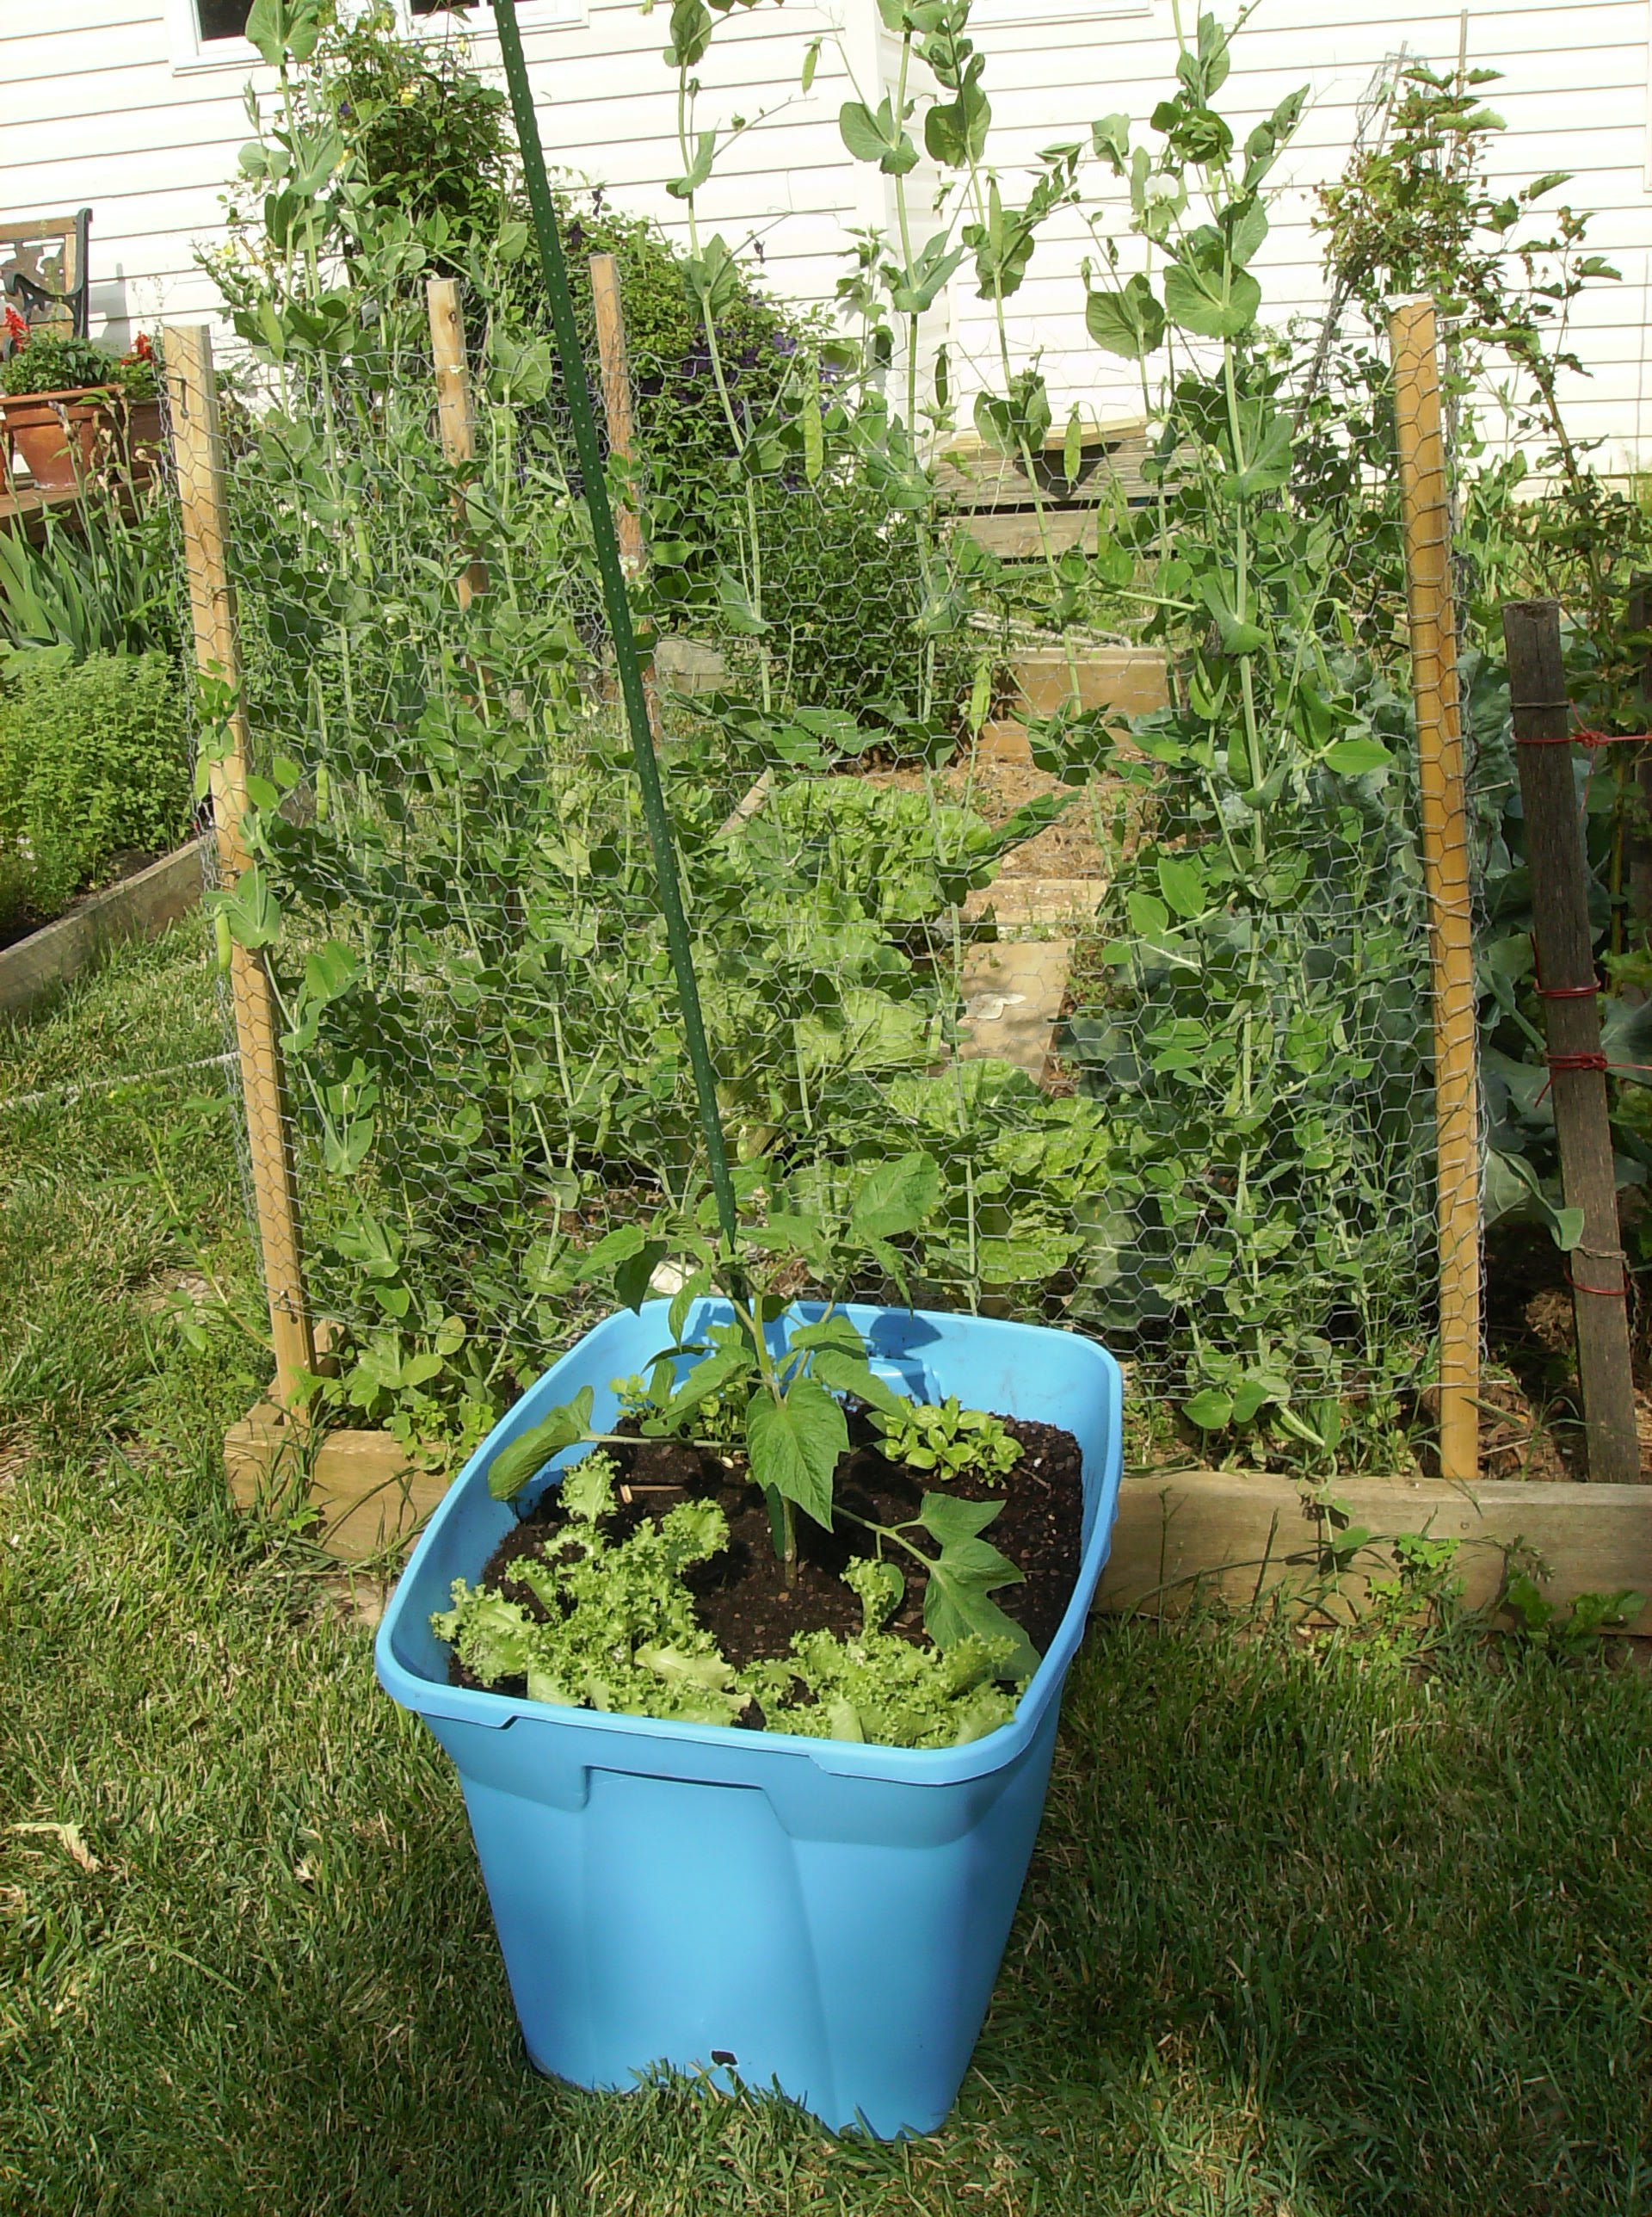 |
| 18 Gallon Container Gardening: The Planted Container |
I also tucked in two endive lettuce plants (front) and some basil
and cilantro (back). The endive will mature in about 10 days and it
will be harvested. It won’t compete with the tomato. The herbs will grow
for about 3 weeks before they bolt. That will leave the tomato alone
without competition as it matures. As the tomato matures, I will also
tuck in more cilantro and basil. The container can handle one mature
tomato and 2 or 3 annual herbs.
Other Vegetables
The 18 gallon container can be used to grow other vegetables.
- Two peppers per container
- One squash or one zucchini bush type plant per container
- Two bush cucumbers per container
- One vine cucumber or one vine squash per container (you will need a trellis of some sort)
- One water melon, cantaloupe or similar per container (you do need room for the vine to run)
- One pumpkin per container (you do need room for the vine to run)
- Six to eight heads of lettuce per container.
- Eight to twelve pea plants per container (you will need a trellis of some sort)
- Dozen of herbs per container
Don’t be afraid to experiment. See what you can grow. This is a
great way to garden if you have limited space or if you just want to
grow more vegetables.

Join My Google+ Community Our Tomato and Vegetable Gardens (600+ Members!)
Over 100 HD Garden Videos: Join My YouTube Video Gardening Channel
Follow and Organize The Rusted Garden on Pinterest
No comments:
Post a Comment
Visit The Rusted Garden's YouTube Video Channel
Follow The Rusted Garden on Pinterest