FB HEADER

Search The Rusted Garden Journal: Just Enter a Key Word or Phrase

Tuesday, October 10, 2023

Ep-4 Putting Fall Garden Beds to Winter Rest/Amending & Making Garden Soups: The Rusted Garden Homestead: All About Growing, Cooking, & Sharing Food

The Rusted Garden Homestead  podcast is all about sharing my passion for growing, cooking, and sharing food with family and friends.  In this episode, I talk with my friend Erica Jones, a master gardener and chef.  Today we cover putting garden beds to rest in the fall. We go over basic amending and tucking the beds in for winter slumber. We also cover the basics for making garden soups. How do you get started!


New episodes will be launched on the 2nd and 4th Wednesday of each month. 

Thanks! How to support...
The Rusted Garden Homestead Podcast: https://www.buzzsprout.com/1846799/supporters/new

Host & Creator
More information about Gary Pilarchik...
The Rusted Garden Journal Blog: https://therustedgarden.blogspot.com/
The Rusted Garden Seed and Garden Shop: https://www.therustedgarden.com/
The Rusted Garden on Youtube: https://www.youtube.com/@THERUSTEDGARDEN
Follow Gary Pilarchik on Instagram: https://www.instagram.com/therustedgarden/
Follow Gary Pilarchik on Threads: Search The Rusted Garden on Threads

Guests & Cohosts
More information about Erica Jones...
Connect with Erica! at https://www.edesiagurl.com/ 
Follow Erica on Instagram: https://www.instagram.com/edesiagurl/

Interested in advertising or sponsoring a podcast?
Contact The Rusted Garden at therustedgarden@gmail.com


Subscribe to my YouTube Channel The Rusted Garden Homestead
Over 650,000 Subscribers and Over 2000 Garden Videos Designed to Quickly Present Information!


Visit The Rusted Garden Seed and Garden Shop
for your Seeds, Starting Supplies, Fabric Pots, Neem Oil,
Peppermint and Other Oils, Calcium Nitrate and More.
The Rusted Garden Seed and Garden Shop


Tuesday, October 3, 2023

The Under $10 Budget Low Tunnel Design: Grow Cool Weather Crops Into the Winter

BEING WRITTEN NOW 10/3/2023


Subscribe to my YouTube Channel The Rusted Garden Homestead
Over 650,000 Subscribers and Over 2000 Garden Videos Designed to Quickly Present Information!


Visit The Rusted Garden Seed and Garden Shop
for your Seeds, Starting Supplies, Fabric Pots, Neem Oil,
Peppermint and Other Oils, Calcium Nitrate and More.
The Rusted Garden Seed and Garden Shop


Friday, September 22, 2023

Garden PVC Pipe Design With 3 Uses: Low Tunnel Frost Protecting, Garden Trellising, and Shade Cloth Sun Barrier


When I create something for my garden, I try and follow two rules when I design. It should be easy to assembly, take down, and store. It should also solve several problems when possible. This project meets those rules. 

Garden PVC Pipe Low Tunnel

The rib design requires a mallet and bending PVC pipe. Each rib can be set up or taken down in under 2 minutes. The low tunnel frame work can be used to hold plastic, as a mini-greenhouse, for starting crops earlier in the season or for extending the season into the winter. The plastic can be swapped out for shade cloth to prolong the growing period of cool crops or as a way to reduce the heat of the midsummer sun and keep warm crops producing. You can also use agfabric or insect fabric on the design, to protect crops from insect pests like cabbage worms. 

Space the ribs 2-3 feet a part. The video show you how to build it in more detail, but just hammer in the rebar to at least 1/2 its length and drop the rebar on. I will be doing a future post and video on how to put on the plastic when that time arrives for my garden. There are dozens of ways to do it, once you create the framework. I have over 1500 garden videos if you want to follow me on my YouTube channel: The Rusted Garden.


Materials

PVC Pipe
8-10 foot pieces of 1/2 inch PVC 
3 pieces will create 3 ribs and additional piece is needed if you want to use a piece across the top

Rebar
18-24 inch pieces of rebar
You will need 2 pieces for each rib placement
(The rebar should be smaller than the opening of the PVC pipe)

Wire or Rope
Used to secure support pipes

Greenhouse Plastic or Painters Tarp 
Enough to cover the frame and leave 2 feet on each side

Shade Cloth
Enough to cover the top of the frame and cover 1/2 down each side

Insect Fabric
Enough to full cover the sides and opening on both ends


Mallet and Rebar

Rebar and PVC Pipe

Securing PVC Piping


I will be putting on the plastic in about 4 weeks, late October. The frame itself can be left up all season long and the 'rainbow' ribs can be strung and used as a trellis. I like that this design can stay out all year or the PVC pipe can be popped off the rebar and easily stored. The rebar could remain in the ground but it is also easily removed.  

Shade cloth allows you to keep the soil cooler which means cool crops won't flower and bolt and warm crops won't shut down, due to high soil temperatures, and stop producing. The ribs (below), could have cucumbers all over them with shade cloth protecting them from late July's sun. The design is versatile. 


Shade Cloth Extends Seasons & Maintains Growth

"A Garden Wants to Give"
Cheers,

Gary (The Rusted Garden)

Subscribe to my YouTube Channel The Rusted Garden Homestead
Over 650,000 Subscribers and Over 2000 Garden Videos Designed to Quickly Present Information!


Visit The Rusted Garden Seed and Garden Shop
for your Seeds, Starting Supplies, Fabric Pots, Neem Oil,
Peppermint and Other Oils, Calcium Nitrate and More.
The Rusted Garden Seed and Garden Shop


Friday, September 15, 2023

How to Grow Fruits, Vegetables & Herbs 365 Days a Year in a Sunglo Greenhouse: Increase Summer Crop Yields & Grow in the Dead of Winter


Sunglo Greenhouses for 4 Season Growing


Imagine stepping into a world where the changing seasons no longer dictate when you can enjoy fresh, homegrown vegetables. Thanks to Sunglo Greenhouses, this vision is becoming a reality for greenhouse enthusiasts. Let’s delve into how a Sunglo Greenhouse Kit can help you cultivate a diverse array of vegetables year-round.


Plenty of Space for Your Growing Needs


A 
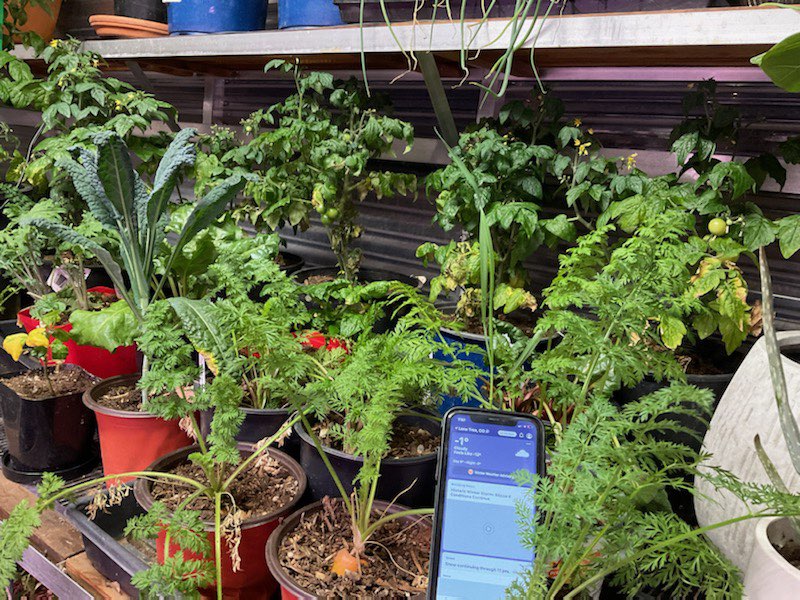
Sunglo Greenhouse will increase your tomato and other vegetable yields because you can start growing earlier and later into the season. Sunglo Greenhouses are designed for growing food through the entire year, even in the coldest winters.
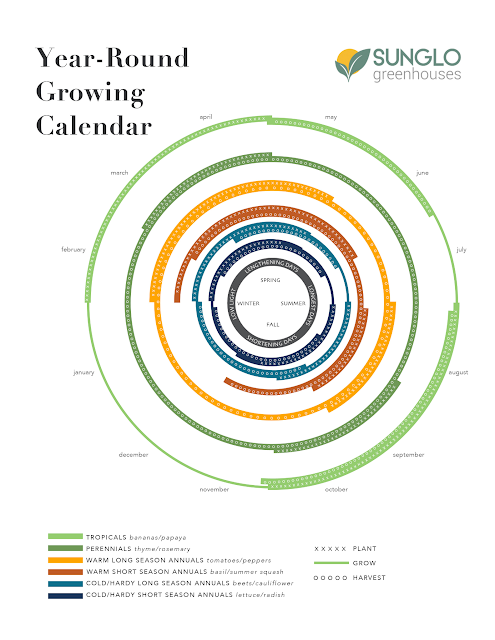
Tailored Growing Environments

A typical planting calendar offers a wealth of knowledge about optimal planting times for various vegetables and herbs. However, these recommendations often hinge on weather conditions that can be unpredictable and harsh, especially during extreme seasons. This is where Sunglo Greenhouses come into play. These meticulously designed greenhouse kits allow you to create and maintain tailored growing environments, ensuring that your plants thrive regardless of the external climate.

Extending the Growing Season


The planting calendar outlines when to sow seeds, transplant, and harvest, taking into account temperature, light, and other environmental factors. By harnessing the climate control capabilities of Sunglo Greenhouses, you can extend growing seasons well beyond what traditional outdoor gardening allows. Want to harvest vine-ripened tomatoes in the middle of winter or enjoy crisp lettuce during the heat of summer? With a Sunglo Greenhouse, you’re no longer confined to nature’s limitations.


Protection from Adverse Elements

Mother Nature can be unpredictable, and sudden weather changes, pests, and diseases can wreak havoc on your outdoor crops. Sunglo Greenhouses act as a protective shield, safeguarding your plants from these external threats. This means fewer setbacks due to frost, severe storms, pests, and other factors that can derail outdoor gardening efforts. With the greenhouse’s sturdy construction and advanced features, you can rest assured that your vegetables are growing in a safe and controlled environment.

Energy Efficiency and Sustainability


Sunglo Greenhouses are designed with energy efficiency and sustainability in mind. The use of double-wall acrylic plant friendly panels, proper active ventilation systems, and optional geothermal and infrared heat to reduce energy consumption. By minimizing your environmental footprint, you’re not only growing fresh produce year-round but also doing so in an environmentally responsible manner.

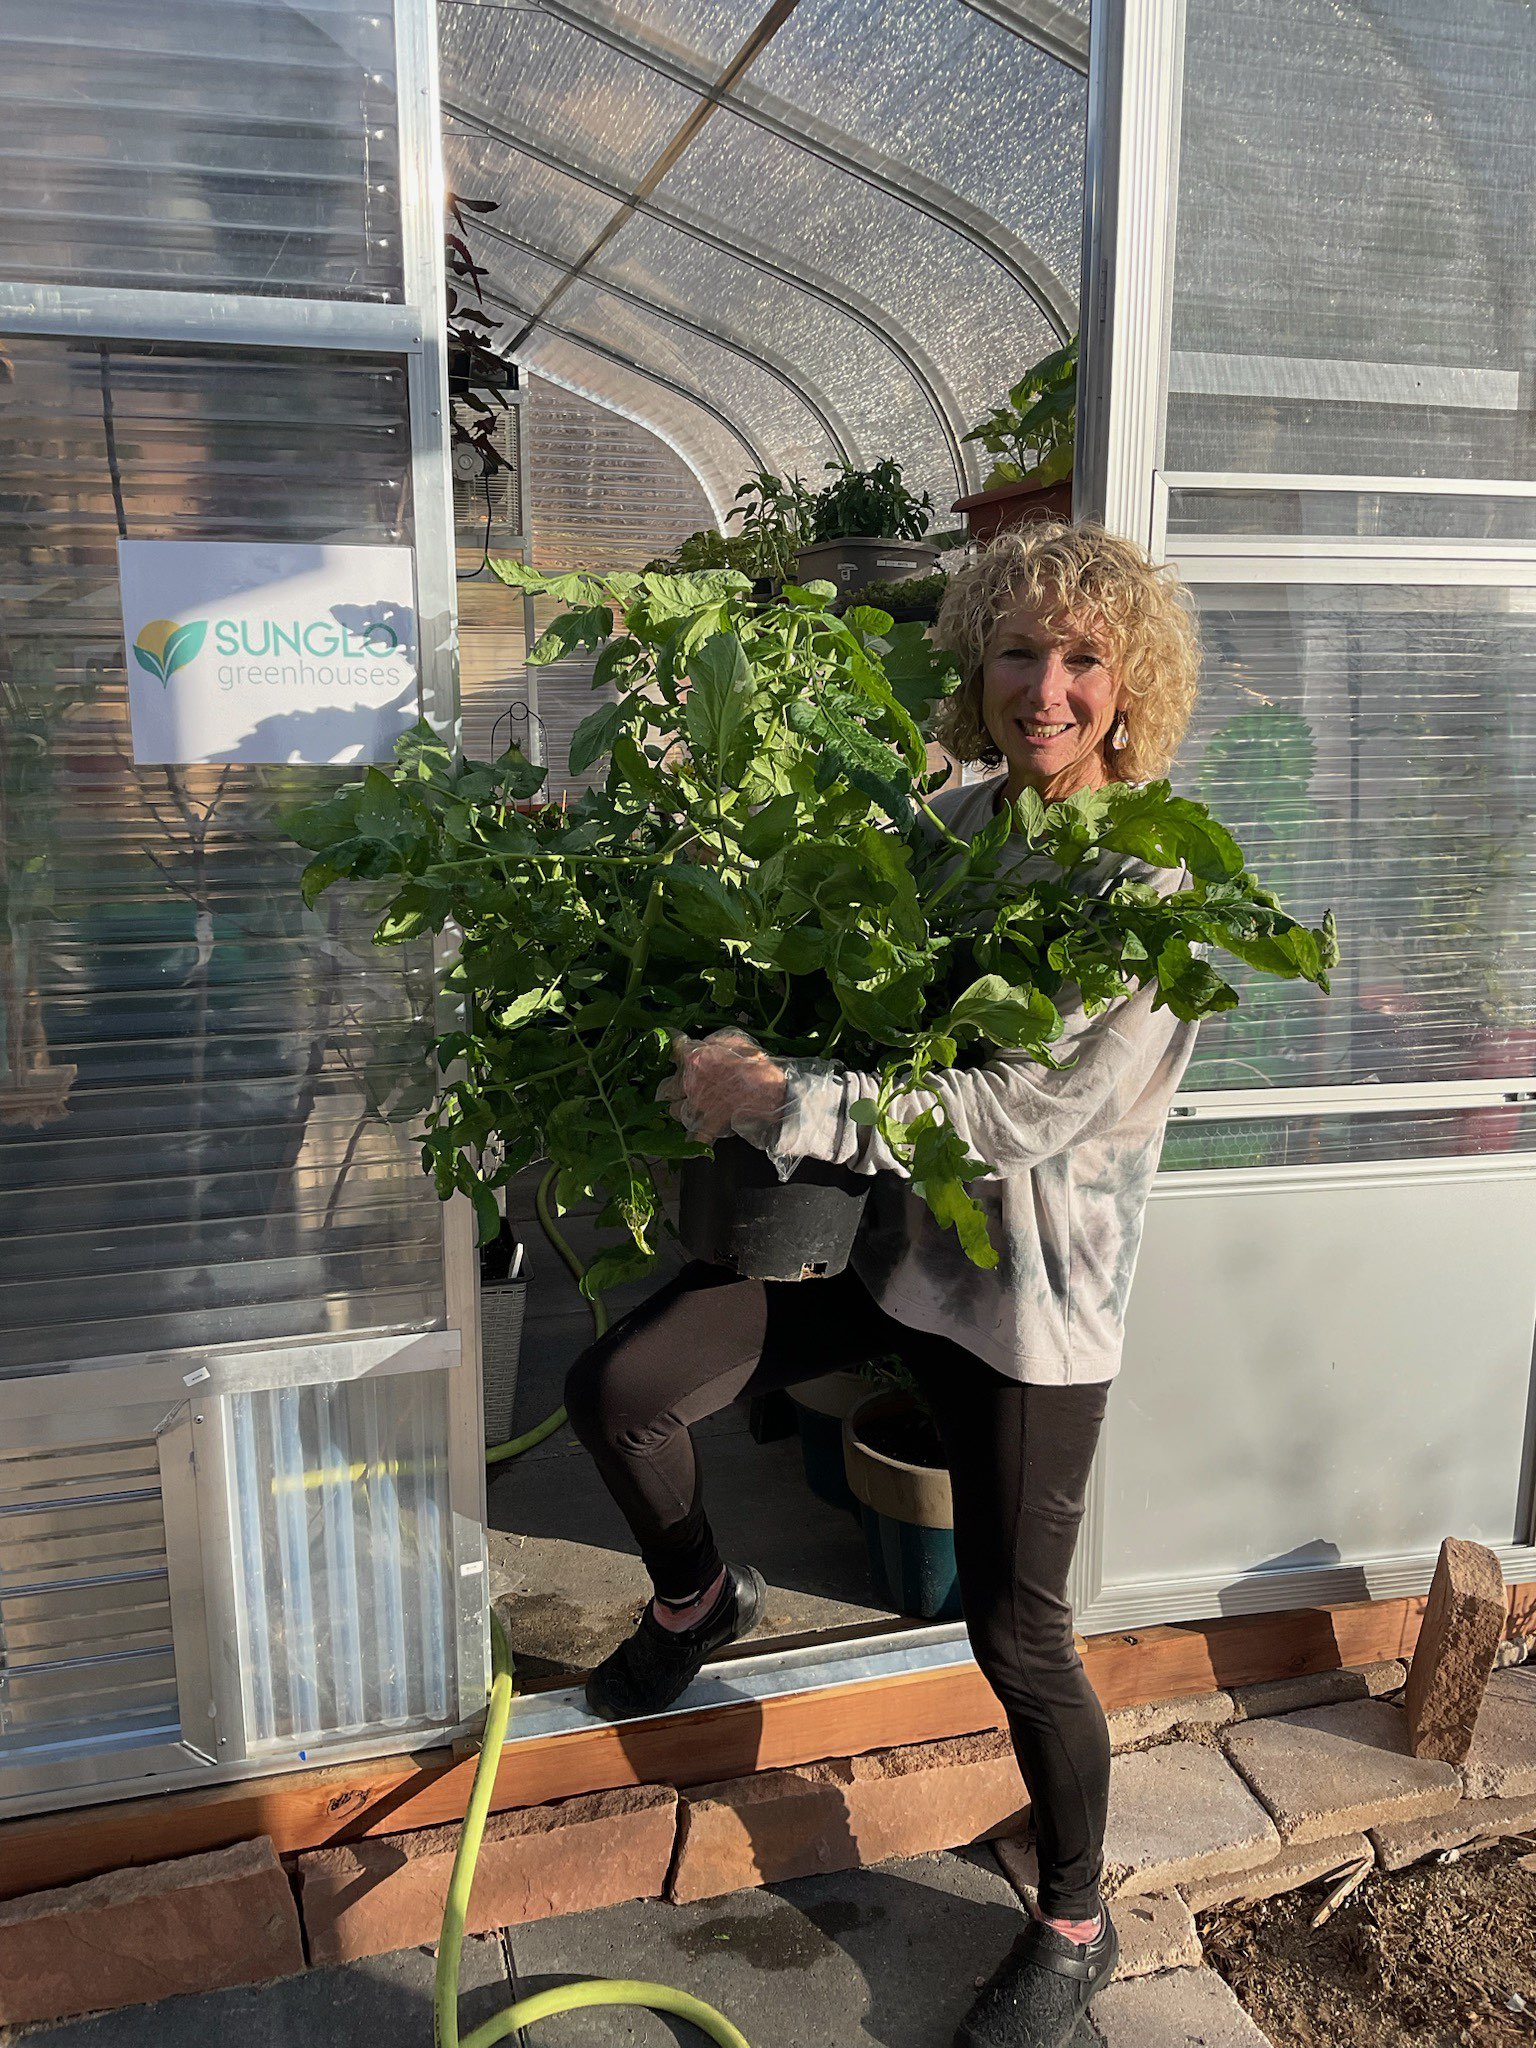
Personalized Greenhouse Solutions


Sunglo backyard greenhouse kits come in various sizes and options, specifically catering to the needs of home gardeners. Whether you have a small backyard or a larger yard, there’s a Sunglo Greenhouse that suits your requirements. This adaptability allows you to tailor your greenhouse to the crops you intend to grow, making it a versatile and personalized solution.
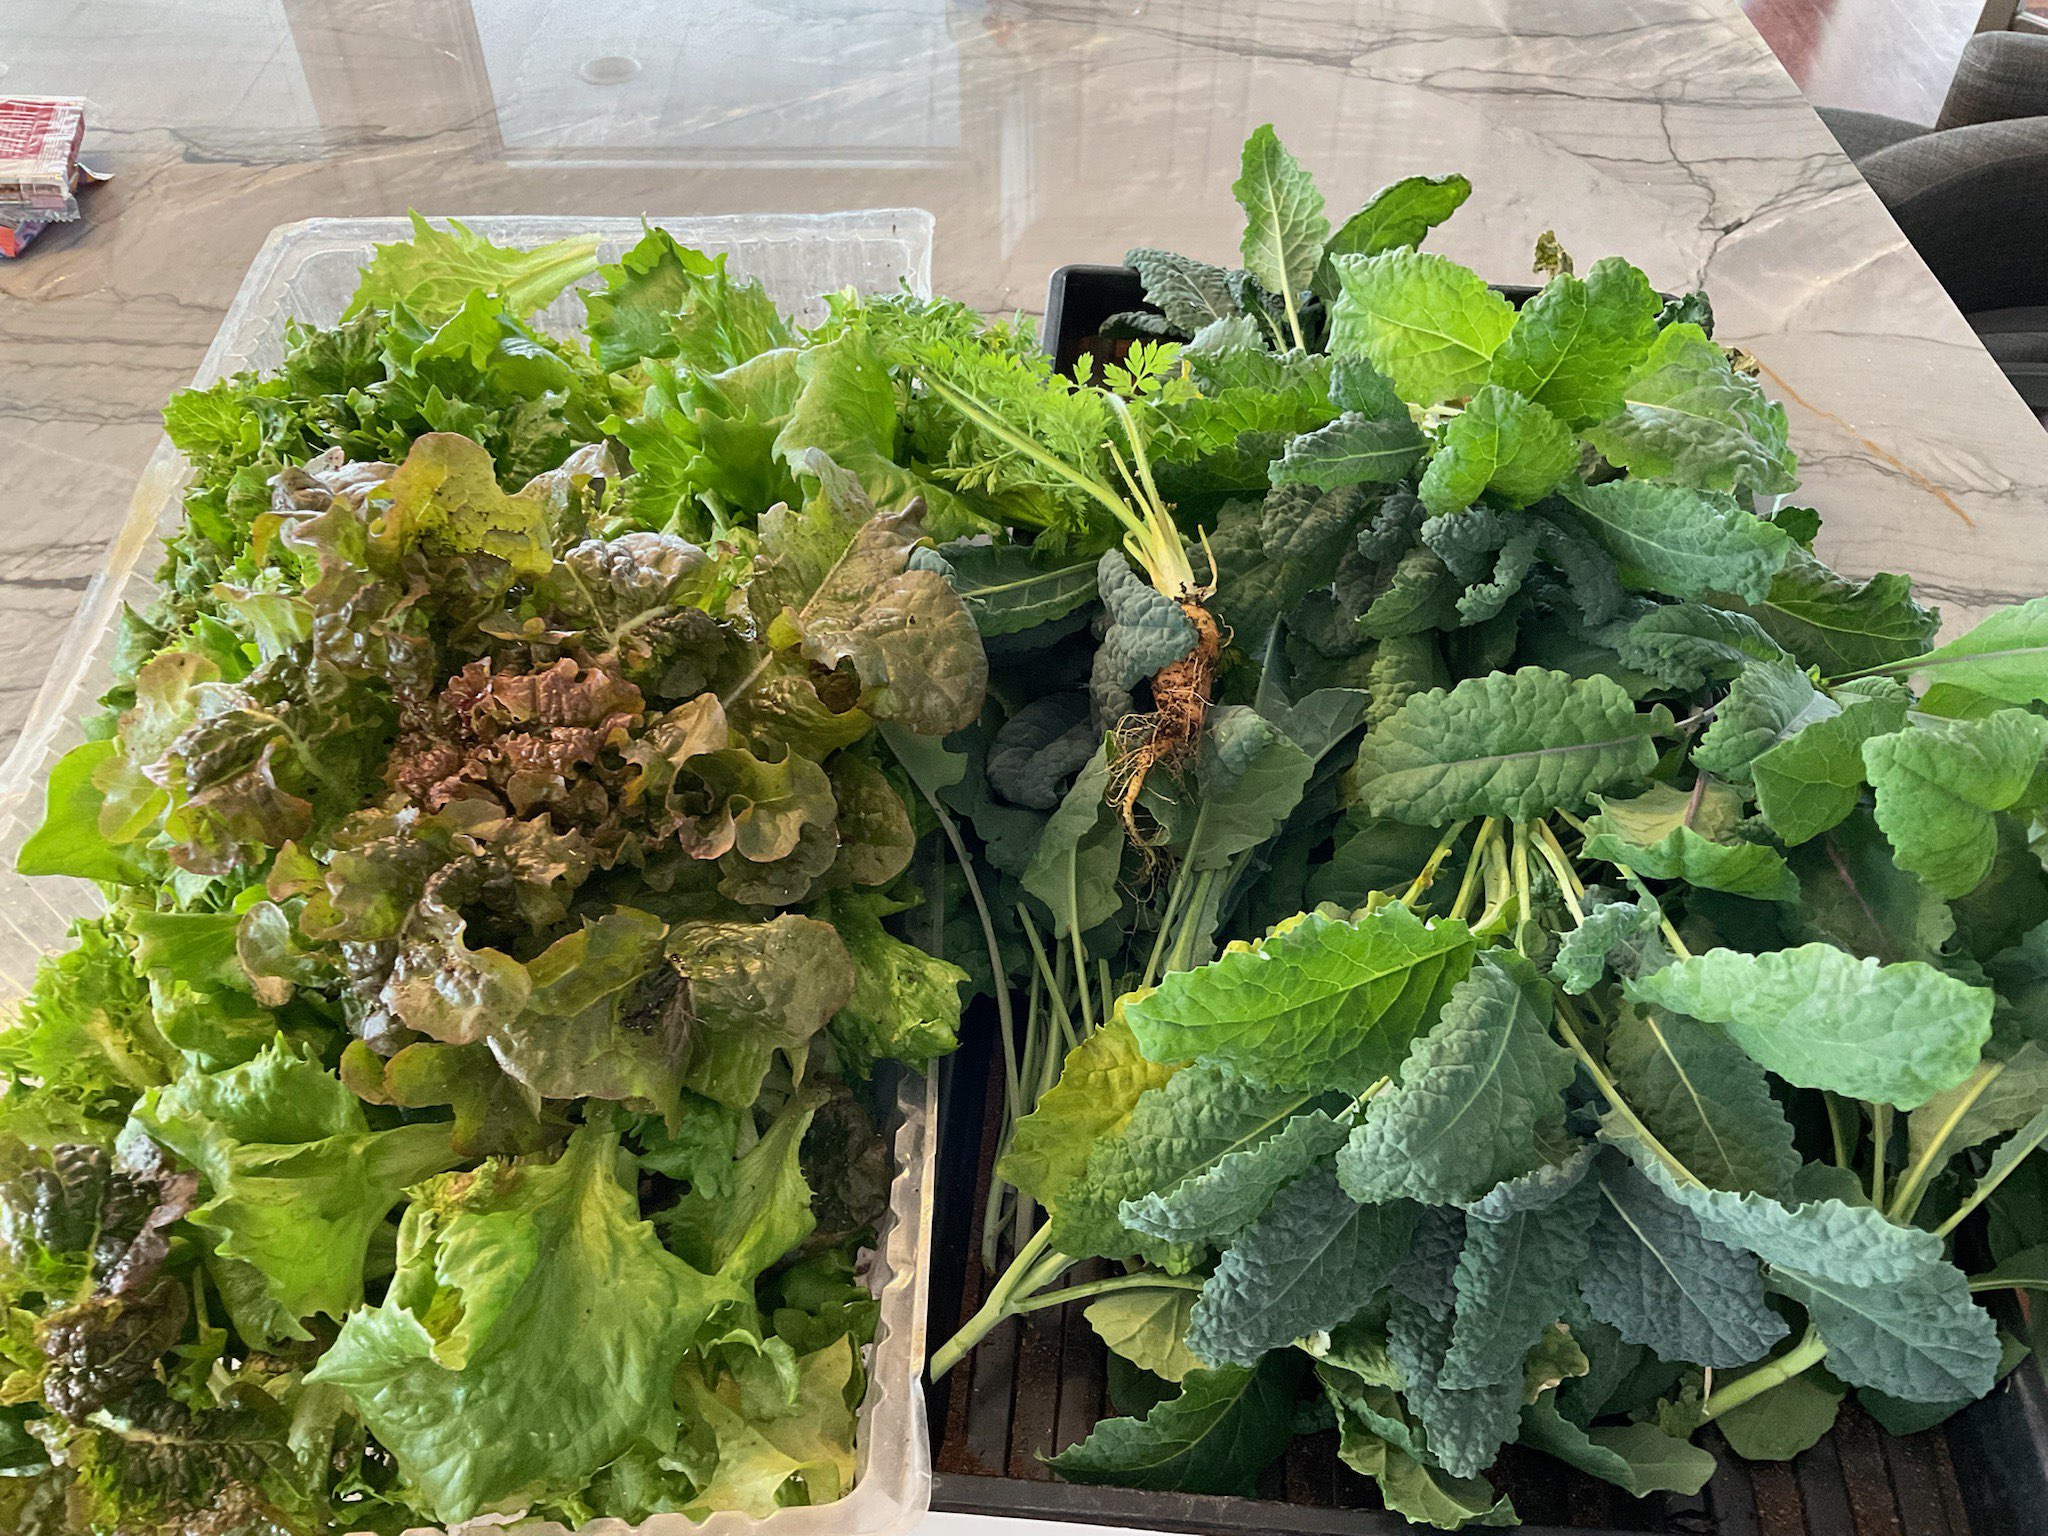


What can I grow in winter?


Vegetable crops can be broken down into two main categories, cool season & warm season. These two categories help a gardener better understand when to plant as well as what conditions they prefer to grow in.

Cool season vegetables prefer lower daytime temperatures that typically occur during the early spring, fall, and winter. Vegetables that grow best between 40F and 70F are considered Cool-Season crops. A few cool season varieties will even tolerate light frosts which can improve the flavor and quality.

With a Sunglo Greenhouse you will be able to easily grow Cool-Season vegetables seven months out of the year. When outside temperatures begin to drop, cold hardy and frost-tender vegetables will continue to thrive and produce food inside a Sunglo Greenhouse. The double-wall acrylic panels of a Sunglo provide enough insulation to minimize the energy cost of a heater. If your goal is to produce Cool-Season vegetables through the winter we highly recommend you add the ‘Winter Package’ to the greenhouse. With the addition of insulation by using a third layer of acrylic, an infrared heater, and our exclusive geothermal raised beds (GAHT® Lite) you can produce food in winter even when outside temperatures are below zero degrees.

Here is a list of Cool-Season Vegetables that can easily be grown inside a Sunglo Greenhouse throughout fall, winter, and spring:


Grow Food All Winter Long in Sunglo Greenhouse


Asparagus

Beets

Bok Choi

Broccoli

Brussels Sprouts

Cabbage

Carrots

Cauliflower

Celery

Chard

Asian Cabbage

Daikon

Endive

Escarole

Garlic

Kale

Kohlrabi

Leeks

Lettuce

Mustard Greens

Parsley

Parsnips

Peas

Radishes


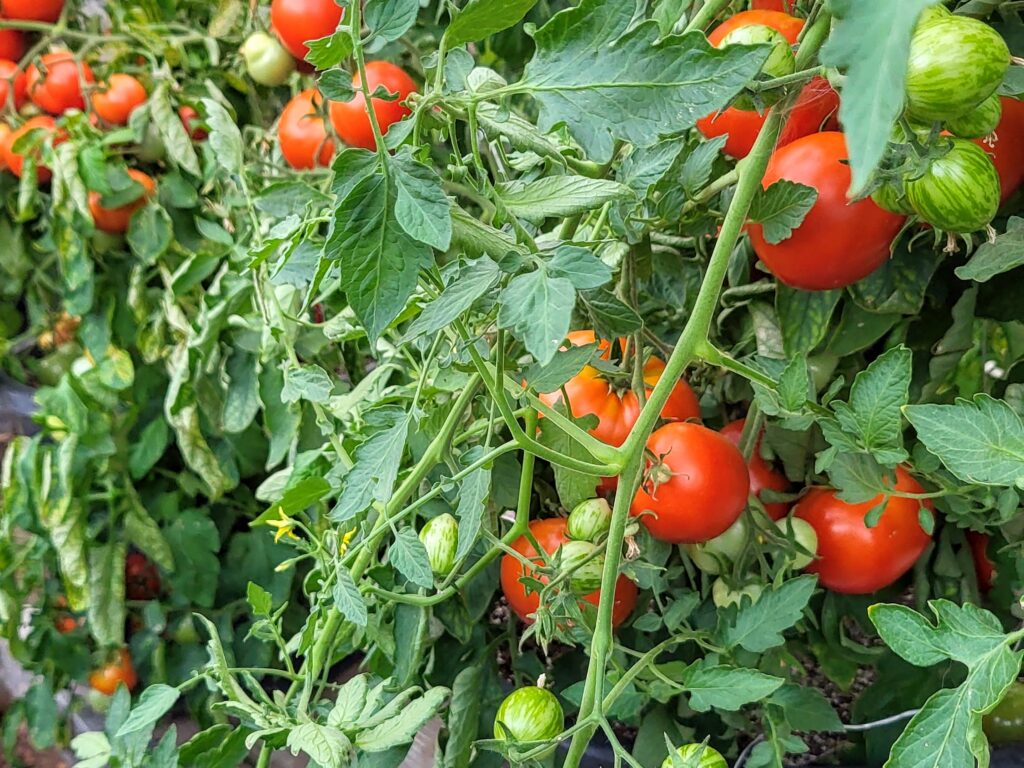
In contrast,  warm season vegetables require long days, high light, and temperatures from 55F to 85F to grow best. With a Sunglo Greenhouse you will be able to successfully grow Warm-Season vegetables April through October but you can also easily grow warm-season vegetable plants inside a Sunglo Greenhouse over winter. However, you can expect yields to decline in the depths of winter (Late December- Mid February). These vegetables depend upon both high air temperatures and soil temperatures so growing these crops in the short days of winter typically requires a large use of energy. The Sunglo Winter Package is even more important for Warm-Season vegetables because it minimizes the energy costs needed to achieve these higher temperatures. Grow lights are also necessary to provide additional light to allow for eight and sixteen hours per day of light, every day. Hand pollination will also be required.

It is important to note that warm-season crops are not compatible with growing cool-season crops due to the differing temperature and light requirements discussed so you need to choose between cold or warm season vegetables upfront.


Increase Tomato & Vegetable Yields in a Sunglo Greenhouse

Here is a list of some Warm-Season Vegetables that can easily be grown inside a Sunglo Greenhouse throughout spring, summer, fall, and winter:


Cantaloupe

Cucumbers

Eggplant

Beans

Watermelon

Peppers

Okra

Pumpkins

Summer Squash

Herbs

Strawberries

Ginger

Ginger

Potatoes

Tomatoes

Winter Squash

Bunching Onions

Tomatillos


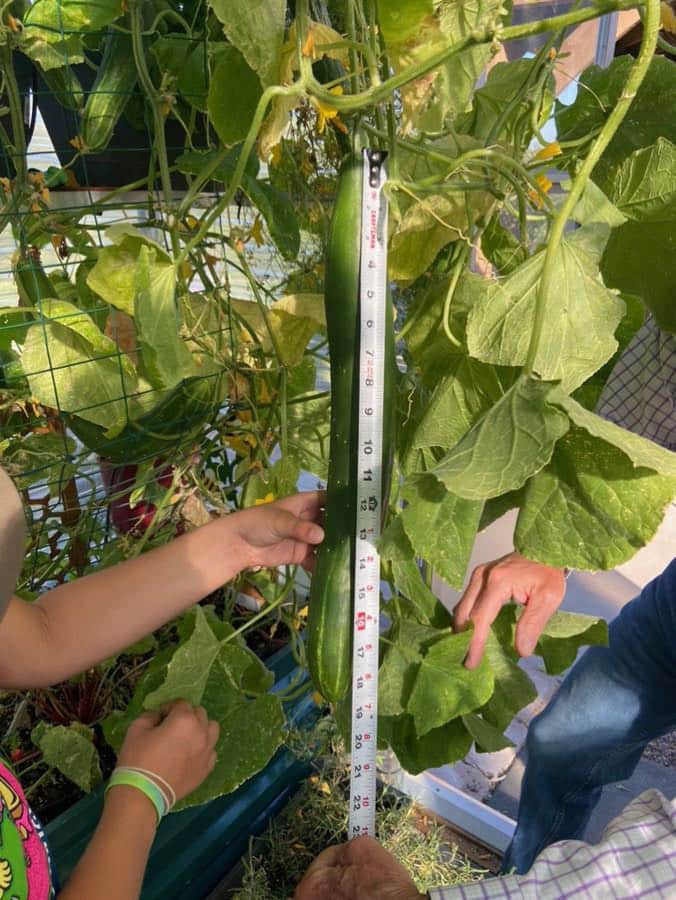
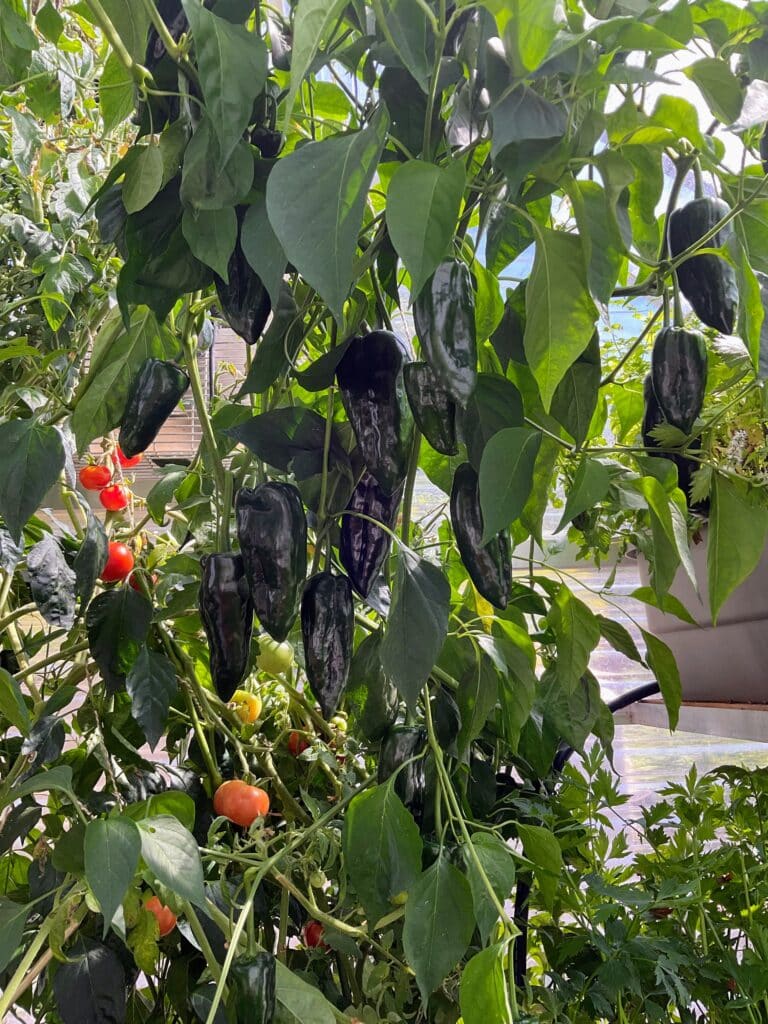
Growing inside a Sunglo Greenhouse you can expect greater crop yields and even larger produce at times, for example this 19″ long cucumber. With consistent warmth at night, pepper plants can produce more fruit earlier in and throughout the season. 


Larger Fruits: 19 in. Cucumber


Increased Pepper Production


In conclusion, the convergence of Sunglo Greenhouses and the insights provided by a planting calendar offers an exciting opportunity for year-round vegetable cultivation. With controlled environments, extended growing seasons, and protection from external challenges, greenhouse enthusiasts can now produce a bountiful harvest regardless of the weather. By leveraging the advanced technology of Sunglo Greenhouses and the knowledge of a local planting calendar, you can embark on a journey to transform your gardening experience and savor the taste of fresh, homegrown vegetables throughout the year.

Take your growing to a new level with Sunglo Greenhouse. Best greenhouse for cold climates!


Please visit Sunglo Greenhouses to learn more about what our greenhouse can do to help you grow all year long. You can speak with a Sunglo Professional who has experience growing in a Sunglo Greenhouse by calling  720-443-6711 or visit our website and see what we are all about and what is on sale right now.

"This is a sponsored post. I have been working with Sunglo over the 2023 season. I am interested in growing food through Maryland's winters. Unlike the basic greenhouse I bought for seed starting, Sunglo Greenhouses are about growing food all season long. I recommend learning more about Sunglo Greenhouses before making a decision on a purchase. If you want to grow an abundance of food through the winter, I recommend Sunglo."

"A  Garden Wants to Give."
Cheers!

Gary (The Rusted Garden) 


Subscribe to my YouTube Channel The Rusted Garden Homestead
Over 650,000 Subscribers and Over 2000 Garden Videos Designed to Quickly Present Information!


Visit The Rusted Garden Seed and Garden Shop
for your Seeds, Starting Supplies, Fabric Pots, Neem Oil,
Peppermint and Other Oils, Calcium Nitrate and More.
The Rusted Garden Seed and Garden Shop


Friday, September 8, 2023

The Tomato Hornworm and Parasitic Wasp Cocoons: Garden Friend or Foe?

Let's get right to the point... A single 'Tomato Hornworm' can devastate a tomato plant in a couple of days. Several, can wipe out a plant overnight. If you wake up to missing tomato leaves, you most likely have hornworms. They should be removed immediately and killed. They are green, large, and really look like someone made an alien lifeform from clay. They are bad for a garden.

Parasitic Wasp Cocoons on a Tomato Hornworm 

If you see white cocoons covering the top of a hornworm, that is good. Freaky looking and even more alien looking, but good. A predator wasp, one that eats insects, has laid eggs just under the skin of the hornworm. The larva, once hatched, slowly digest the host and come out and form all those white cocoons as seen in the picture. You want the cocoons to mature and release wasps that will become part of your garden. Not all wasps sting or bother gardeners.


A great way to find the tomato hornworm is at night, using a UV light, sometimes called a black light. They are easily found online as an inexpensive flashlight. Shine the light on your tomato plants and the hornworms will actually 'glow' and reveal themselves. Grab and remove them. Visit my Amazon Shop for garden related items.


Search UV Flashlights on My Amazon Shop


"A Garden Wants to Give"
Cheers!

Gary (The Rusted Garden)

Subscribe to my YouTube Channel The Rusted Garden Homestead
Over 650,000 Subscribers and Over 2000 Garden Videos Designed to Quickly Present Information!


Visit The Rusted Garden Seed and Garden Shop
for your Seeds, Starting Supplies, Fabric Pots, Neem Oil,
Peppermint and Other Oils, Calcium Nitrate and More.
The Rusted Garden Seed and Garden Shop


Tuesday, September 5, 2023

How to Grow Corn Successfully in Small Garden Spaces: All the Details!

Corn is one of my favorite crops to grow. I even enjoy eating it raw, right off the plants before the raccoons get it. A post for another day. The two biggest mistakes people make are; planting their corn in straight rows (side by side) instead of a square or rectangle and not watering nearly enough. Fertilizing is important but not the reason gardeners have trouble successfully growing corn.


Corn Planted in a Square for Small Garden Spaces


Let's start with understanding how corn pollinates the female silks. The tassels on top of the cornstalks are the male flowers and source of pollen. The silks, that protrude out of the stem and leaf joints, along the cornstalk, are the female fruit, your future ears of corn. Each silk is attached to only 1 potential kernel of corn. Every silk must be pollinated for the ear to be fully loaded with corn kernels. Pollination failure means missing kernels of corn.


Corn Tassels Produce Pollen (Male)

Corn Silks Create Corn Kernels (Female)

The wind is what disperses the pollen across the corn plants and onto the corn silks. If you plant your corn in single, double, or even triple rows, you will end up with poorly formed ears of corn. As the wind blows through the tassels of row planted corn, all the pollen will blow away to settle elsewhere in the garden. Here is my YouTube Channel video that supports this blog post. Plant your corn in blocks, like a square or a rectangle. It is the pollen from several cornstalks over that typically pollinates the silks of other cornstalks. Row planting corn defeats this mechanism of pollination.


I recommend the minimum block of corn have at least 10 plants growing along each of the 4 sides. The spacing for each seed should be 6 to 8 inches. Anything greater than that, is a waste of garden space. Plant each seed 1 inch deep. By creating a block of cornstalks, such as planting in a 4 foot by 4 foot space, you create a dense block of tassels and pollen. The wind will now distribute pollen across the cornstalks and not to irrelevant space in your garden.

Corn plants loves water and we tend to underwater them greatly. When temperatures are in the 90's, I recommend watering corn, that is knee high and larger, every other day with a good 1-2 inches of water across the entire block planting. 

Block Planted Corn


I typically fertilizer my corn with a water-soluble fertilizer at seeding, around waste high, and maybe again with the tassels are forming. Corn is a heavy feeder. The garden beds can be prepped with compost and organic granular fertilizer. However you amend the beds, as it will vary based on what is available to each gardener, mix the amendments well (4-6 inches deep) into the planting area. I also recommend planting corn that matures in around 65 days. Shorter to harvest corn varieties will allow you to plant corn twice in most gardens.


"A Garden Wants to Give"
Cheers!

Gary


Subscribe to my YouTube Channel The Rusted Garden Homestead
Over 650,000 Subscribers and Over 2000 Garden Videos Designed to Quickly Present Information!


Visit The Rusted Garden Seed and Garden Shop
for your Seeds, Starting Supplies, Fabric Pots, Neem Oil,
Peppermint and Other Oils, Calcium Nitrate and More.
The Rusted Garden Seed and Garden Shop


Friday, September 1, 2023

9 Fast Growing Crops to Direct Seed in September and How to Space the Seeds for Full Size Crops!

Cool crops prefer, generally speaking, 50-60 degrees Fahrenheit/ 10-15.5 degrees Celsius nights. They enjoy cooler days as well. As fall approaches, the cooler nights are a signal the hot summer temperatures are beginning to break. The warms soil of summer is perfect for germination and getting some accelerated growth for the cool weather fall loving crops. You want to start seeing some of the above type night temperatures, a couple of weeks after direct seeding.  


Summer Planted Peas for a Fall Garden


Direct seeding is the cheapest way to grow vegetables and summer into fall is perfect for direct seeding these 9 crops. You may have to test the timing of sowing them in your garden, so take notes and use them for next year as you perfect the timing. If you sow too soon the heat can be an issue. If you so them too late, they may not fully mature before a hard ground freeze. These crops can take frosts, so freezing leaves are okay.  

The goal for my spacing numbers is fully mature crops.  You can always plant crops closer if you are going to be harvesting them at a smaller size. However, I wanted to give the minimum spacing from experience to get full size plants. You can always add more space if you are concerned about distance.

Rows between crops can be 6-12 inches or 15-30 cm. I recommend the higher end if you are just getting started with growing. The spacing numbers between seeds is based on my last 20 years of growing. These crops mature quickly and the days to maturity range starts at germination.


Seed Spacing & Days to Maturity

Peas 2 inches or 5 cm apart - Matures in 60-75 days

Turnips 4 inches or 10 cm apart - Matures in 50-60 days

Mustard Greens 6 inches or 15 cm apart - Matures in 35-45 days

Arugula 4 inches or 10 cm apart - Matures in 25-25 days

Lettuce (Romaine) 6 inches or 15 cm apart - Matures in 45-55 days

Spinach 4 inches or 10 cm apart - Matures in 55-60 days

Radishes 3 inches or 7.5 cm apart - Matures in 25-40 days

Carrots 2 inches or 5 cm apart - Mature sin 60-80 days

Pak Choi 8 inches or 20 cm apart - Matures in 30-40 days


The benefit of growing from summer into fall is faster germination. Radishes will germinate in under 5 days. Arugula can germinate in 3 days. They plant will grow more quickly too and that helps the plants establish before the cool weather and occasional frost set in. 


Damaged Radish Leaves and Future Romaine Transplants


The problem with sowing fall crops now is the insect and pest pressure is really high as the insects have been thriving and multiplying. I highly recommend putting down a snail and slug bait when you sow and about every 2 weeks for a couple of rotations. Snails and slugs can devastate seedling in a day. Any bait that uses iron phosphate or sulfur is effective. Here is a link to My Amazon Shop, if you want to view the baits there. Snail and Slug Baits I recommend. And below is my video, covering these 9 plants, you can find over 1600 gardening videos on my YouTube channel: The Rusted Garden.


"A Garden Want to Grow"
Cheers!

Gary (The Rusted Garden)


Subscribe to my YouTube Channel The Rusted Garden Homestead
Over 650,000 Subscribers and Over 2000 Garden Videos Designed to Quickly Present Information!


Visit The Rusted Garden Seed and Garden Shop
for your Seeds, Starting Supplies, Fabric Pots, Neem Oil,
Peppermint and Other Oils, Calcium Nitrate and More.
The Rusted Garden Seed and Garden Shop


Tuesday, August 29, 2023

A 2 in 1 Garden Crop Cover ( Rabbit, Deer, Squirrel, and Bird Protection) & Garden Trellis: A Versatile, Inexpensive, and Easy DIY Project!


One rule I try to follow when making anything for the garden is... can it serve more than one purpose. I also keep in mind, the ease of construction, the ease of storage, the ease of use, and the ease on my out of pocket costs. 


A Basic Frame for Crop Protection


This easily constructed basic frame checks all the boxes. It can be cut and measured to fit any size raised bed or garden space. A simple set of legs or supports will allow it to sit over the ground or over a collection of containers. You can use this build to protect your crops from rabbits, deer, squirrels, and birds. When it isn't protecting your plants, you can use as a light weight trellis.


Easy to Build Frame for Crop Protection


Use Flat or Slightly Propped as Plants Grow


The key to this design is using a piece of wood to secure all 4 corners of the frame. Cut any scrap of wood to create a rectangular block. It should be wide enough to hold 2 or 3  screws as seen in the picture. Depending on the size and width of the wood you are using for the frame pieces, you want to use 2 or 3 inch screws. It is important to have at least 1 inch of screw length in the rectangular block. Once the frame is secured in the corners, with the blocks, it is solid. The chicken wire or fencing is secured using a standard staple gun. 


The rectangular blocks, not only secure the frame corners, they are used to raise the height of the frame as plants grow. I like to use bricks. The wide base of the rectangular block is perfect for securely sitting the cover on any supports you put under it. Check out my video from my YT Channel The Rusted Garden.


Another use for the basic frame, is a long trellis down the length of a bed. The frame can be tied to posts when using it as a trellis. If you build two frames, you can lean them on each other and build an A frame trellis. In that case, I would just tie the edges that meet, that build the top of the triangle, with rope in several places. Chicken wire can easily support peas, beans, cucumber and even light melons.


Bricks Are Perfect for Raising the Cover


Once Way to Use it as a Trellis

This easy to build and inexpensive frame can be built in any shape that meets the needs of your garden. I like using the materials seen here as the frame is lightweight but very effective. 


"Good Luck in Your Gardens"
Cheers!

Gary (The Rusted Garden)


Subscribe to my YouTube Channel The Rusted Garden Homestead
Over 650,000 Subscribers and Over 2000 Garden Videos Designed to Quickly Present Information!


Visit The Rusted Garden Seed and Garden Shop
for your Seeds, Starting Supplies, Fabric Pots, Neem Oil,
Peppermint and Other Oils, Calcium Nitrate and More.
The Rusted Garden Seed and Garden Shop