Seed starting indoors will save you a lot of money and it isn't difficult to do. You need four things for it to be a successful experience.
- Seed Trays and Flats
- Sterile Seed Starting Mix
- Seeds (but of course)
- And Sunlight
Here are some pictures to give you a visual on what you will need.
 |
| Seed Flats and Trays - The Rusted Garden Blog |
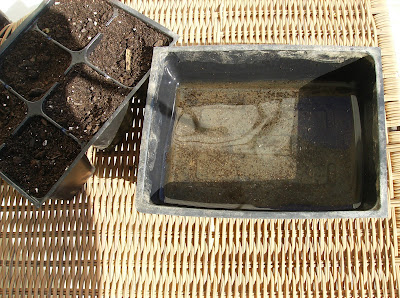
These seed flats (the big rectangles) are life-savers for seed starting. They hold the cells and typically there are 72 cells (left of picture) that you fill with the seed starting mix and plant. The flats are absolutely needed for bottom watering.
Never water the seeds your are starting from above. You not only run the risk of splashing the seeds out but you set up an environment for 'damping off disease'. It is the white fuzzy fungus that grows on the stems of your new seedlings. It kills them. End of story. Fill the flat from the bottom and forget it for a week.
 |
| A Small Flat & Seed Tray - The Rusted Garden Blog |
If you don't need a big set up as many of us don't, you can buy a 6 pack with a tray. The same principles apply. You can see the water in the flat in the picture. I recycle and reuse these year after year.
 |
| Seed Starting Mix -The Rusted Garden Blog |
See my thumb... gee your... ah I'm old and that was from my childhood. You can buy any seed starting mix that you find at your local stores. It is sterile and typically very very dry. Before you put in the cells, like above, add water to it and let it get saturated. If you don't do that it will have a hard time absorbing water from the bottom... it is that dry. I typically put it in a large container, add water and mash it around with my hand.
My thumb is important. Fill the seed trays with the seed starting mix and then press every cell down with your thumb and refill the tray. If you don't do this your seed starting mix will be too loose. You run the risk of the seeds dropping down to the bottom of the cell and you give the roots less mix to grow in.
 |
| Starting Pepper Seeds - The Rusted Garden Blog |
I am planting pepper seeds in the pictures. Plant more seeds than you need and thin to 1 or 2 plants depending on what your are planting for large vegetables. You plant a few extra so you have a better chance of getting a germinating seed. You simply thin the extra plants out. I place the seeds on the medium and press them in with a stick. Just follow the seed pack directions for depth.
 |
| Water and Light - The Rusted Garden Blog |
You need to use an indoor grow light or a windowsill that provides 8 our of sunlight. Make sure the plants get light and you water them from the bottom. Before you know it, you will have hundreds of plants ready to be transplanted and you will save 100's of dollars.
 |
| Lupines and Carnations - The Rusted Garden Blog |
 |
| Heirloom Tomatoes - The Rusted Garden Blog |

Questions? Join My Google+ Community Tomato and Vegetable Gardening
Over 100 HD Garden Videos: Join My YouTube Video Gardening Channel
Follow and Organize The Rusted Garden on Pinterest
No comments:
Post a Comment
Visit The Rusted Garden's YouTube Video Channel
Follow The Rusted Garden on Pinterest