The biggest barrier to having a successful garden is not getting started out of fear, in thinking, you have to know it all. You can't have success if you are not planting and growing. I still don't know 'it all' after 30 years. Realizing you will make mistakes and that it is ok to make mistakes, will make for a better experience in your garden. Mistakes will always be made. You will learn from them and correct them as you learn and gain experience. There is no perfection in gardening.
Here are some common mistakes I made, and most gardeners make, at some point in our gardening careers.
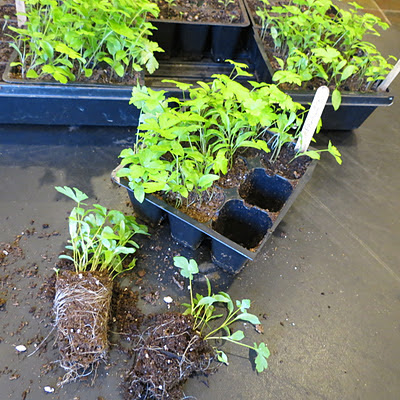
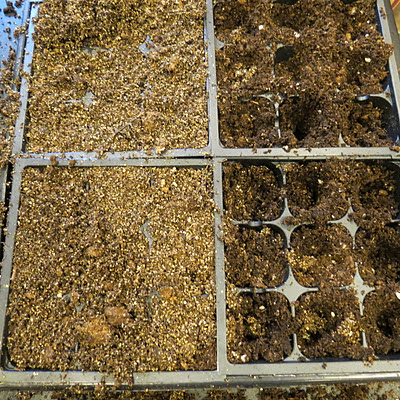
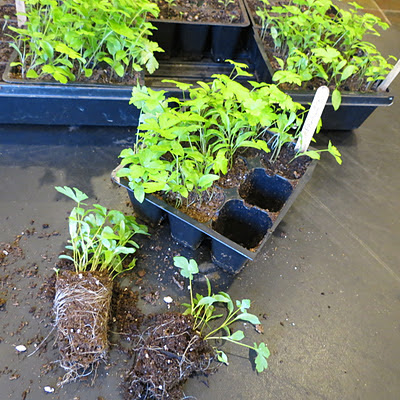
Seed starting mix will be a dark brown when fully saturated and it will always dry from the top down. That means moisture will be below the dry surface. When the top of the seed starting mix becomes a light brown, water the seed starts 1 or 2 days later. This brief period of dried starting mix surface and less moisture is good for the plants. The dry top helps keep fungus and molds at bay and many root systems don't like being continually soaked in fully saturated starting mix.
2 Don’t Save Seeds in a Sealed Container and Buy New Seeds Yearly
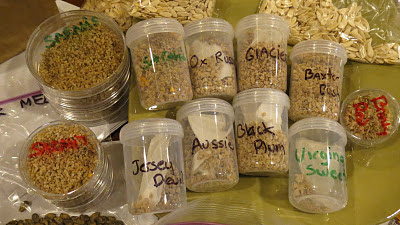
A $2 pack of seeds often comes with a date stamped on the back. That date is irrelevant. People mistake that date as 'a use by date'. Seeds can easy last 3 years and often much longer, if stored properly. Keep your seeds indoors, in a sealed bag or container. If you want to refrigerate them, you can, but it is not needed. You don't need to buy new seeds every year. Just use up what you already purchased.
3 Don’t Sterilize the Seed Starting Mix
Soil microbiology is not needed for starting seeds and growing transplants. However, you can always add it in later if you wish. Most seed starting mixes are peat moss based, and generally speaking, often contains fungus gnat eggs. Start your seeds in a sterile mix. You can best achieve this by saturating you starting mix with boiling water before planting. If fungus gnats hatch, they will quickly infest all your seed starts. You don't want to experience that if you can avoid it.
4 Try and start seeds on a windowsill
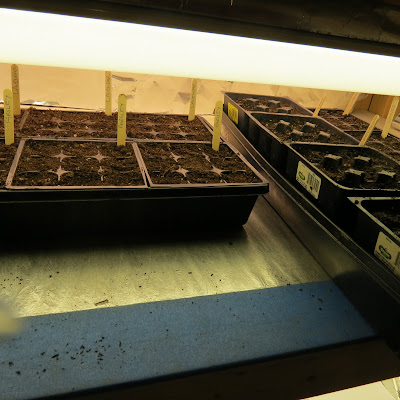
There is just not enough light on a windowsill 99/100 times. Germinating seeds need a minimum 10-12 hours of direct sunlight through a window. You seeds starts will germinate (anywhere) but they will continue to put all their energy into stem growth, trying to reach intense light that just isn't there. They become tall, skinny, and fall over. This is know as plant legginess. Transplants should be started in a greenhouse or under grow lights to prevent this.
5 Over Spend on Grow Lights for Transplants
I've grown transplants indoors for over 20 years using basic shop lights. You don't need to buy specialized lights for growing transplants. Any shop light with white LEDs will be effective if these 2 ratings are met. The shop light should provide 5000+ lumens of light intensity and the color of light should be 4100 - 6500 Kelvin. These numbers are often on the box. If the Kelvin rating is not there, it should say daylight.
6 Start Seeds Way too Early or Way too Late
Generally speaking, plants should grow indoors for 3-12 weeks after germination. This period will vary based on the plant variety. You have to plan to get your transplants outdoors when the soil and air temperatures are appropriate. You can estimate this time period by finding out when the right planting conditions are met in your garden and then count backwards. For instance, tomatoes like no chance of frost, 60 degree soil and 70 degree days. That is typically May 15th in my area. Tomatoes are best grown 6-8 weeks indoors. Counting 8 weeks backwards, I would start them on March 15th.
7 Put Tomatoes and Peppers in the Ground too Early as Transplants
Tomatoes and peppers are warm weather crops. Putting them into the ground when the soil temperature is 40-50 degrees and the days struggle to get into the 60's, just gets you plants that sit and wait. They won't grow, may turn purple, and just struggle. They should get out doors when the soil temperature is averaging 60 degrees and the days are reaching the 70's.
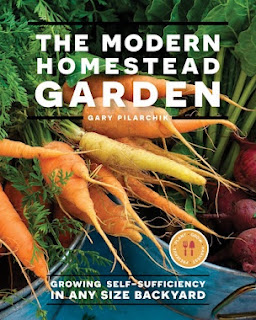
8 Don’t Buy My Book The Modern Homestead Garden
I have a new book call The Modern Homestead Garden. It is perfect for helping you start your first vegetable garden in any sized backyard. It will teach you the skills you need to become a better gardener.
9 Don’t Stratify Seeds that need to be Stratified
Many seeds need to go through a cold period to break the seed's dormancy. Lavender is one of them. Many perennial plants drop seeds in the fall. Nature created 'protection' for them so they don't get tricked by unseasonly warm fall/winter days and germinate, only to be killed off by a freeze. They need to sit in the cold and in most cases need freezing temperatures to break dormancy. Once this period occurs, they wait to germinate, come the warmth of spring. Stratification helps increase the germination rate of seeds and decreases the length of time needed to germinate Not all seeds need this period of cold but when in doubt refrigerate your seeds for 4-8 weeks. Here is a link to my blog article on
35 seed varieties the benefit from stratification.
10 Don’t Keep Lights on Long Enough or Close Enough to Seed Starts
When seeds first germinate and break the surface, they are still in breaking the surface mode and are working on growing their stem. When they feel they hit enough intense light, they slow stem growth and move into leaf growth. Keep your light on 16 hours as your seeds germinate. Once they break the surface, continue with this amount of light for 5-7 days. You can cut the light back to 12-14 hours as they grow, if you wish, after that. Use these number as a guideline.
11 Too Worried About Making a Mistake or Worried About Perfection
You are going to make mistakes and perfection is a goal, we all eventually learn, is just not achievable. The fear of making a mistake and feeling you need to know everything to be perfect, is self imposed, and an unrealistic barrier to fully enjoying your garden. We learn from mistakes and we manage down problems as gardeners. The goal is to enjoy your garden and help it along. No matter how poorly thing go, you'll get better and the garden will produce.
12 Don’t Keep a Journal of When Diseases and Pests Show Up & The Treatments
We remember that day and then we forget. It is important to write down notes, in a journal like, the date and conditions when a disease or insect showed up. It is also important to write down what you used to manage the issue and how you went about using it. These notes should be used over the winter or during a down time to build a prevention plan
13 Don’t Test Spray Sprays on Plants
Any spray you get has the potential to damage plants. This is mostly true for homemade spray recipes. It is good practice to spray any new spray on a few plant leaves and wait 24-48 hours for damage. If there are not noted concerns, spray the whole plant. It is also important to use this process on all plant varieties. Kale leaves are stronger than tomato leaves. Each plant should be test sprayed.
14 Actually Don’t Get Started Due to Feeling They Need to Prepare More
It is easy to feel you need to read a lot and watch a lot of videos to prepare yourself for your first garden. That is helpful to start but we often feel anxious and overwhelmed and fear we will do something wrong when starting anything new. This feeling won't go away with extra readings or more videos. Just get started with a small bed or a containers and the anxiety will slip away.
15 Start too Big, Over Plant, and Get Overwhelmed
A garden grows and plants take off, come summer. You have to imagine what the garden will be like come mid summer. Those 12 inch tomatoes can become 8 foot giants. And the cucumbers and squash plants can quickly take over a space. Start with a couple of beds and a few plants. Imagine what they will look like at full maturity as you put in your transplants and seeds. We tend to over pack our gardening beds at first planting because everything is small and tiny but... they will grow!
16 Pick the Wrong Sized Container for Tomatoes and Peppers
This is another mistake that requires you to think about the size of the mature plant and a mature root system. A tomato transplant will look fine in a 3 gallon pot but it will become a 6 foot plant with a root system that demands water. An indeterminate tomato plant needs to be grown in a 10-20 gallon container to mange the plant's needs at maturity. This mistake is true for all plants but most often happens with tomatoes, peppers, squash, zucchini, and cucumbers. They grow large and demand a lot from a container.
17 Under Water and Under Fertilize Container Plants as the Season Progresses
As plants grow and temperatures warm, more water and fertilizers are needed. A lot of people stick with watering as if it were still spring and the plants were small. When the summer heat comes and plants get to mature size, they may need to be watered 2 and even 3 times a day. Small plants don't need much in the way of fertilizer but when they begin to flower and produce, they need more. Basically, mature plants suck water and fertilizer out of the soil quickly. You really have to increase the frequency of both as the season progresses.
18 Under Water Earth and Raised Bed Gardens
Watering is always a challenge but more is better. Plants can survive with 1 inch of water per week. However, you want your garden plants to thrive. In my experience you want to water well at least 2x's a week with a deep soaking into the soil. In addition to the 2 deep waterings, another shallow watering of the top 6 inches really makes a difference. Garden plants set deep roots and shallow roots. They collect a lot of moister from the surface. Water 3 or 4x's a week is a better rule of thumb as summer heat rolls in.
19 Panic and Spray All Plants When They See a Problem
Spraying is something you will have to do for pests or diseases at some point. Only spray the plant variety that has the problem and fight the urge to spray all plants. For instance if your cucumbers, have a problem, spray all the cucumber plants but don't spray peppers, tomatoes, squash and other plants as 'prevention'. Many pests and diseases only effect on plant type and not others. Spraying an entire garden is bad practice. It can harm healthy plants and kill beneficial insects. Only spray problems and the plants associated with the concern.
20 Panic and Spray Every Type of Spray and Use all Dusts on a Plant with Issues
When you notice a problem take notes and pick a spray or dust. Apply the remedy and wait several days and look for change. It may take take 7-10 days to fully notice improvement. Often, we want immediate results and begin to think more is better. We spray more frequently then recommended. We apply multiple sprays on top of each other and use dusts after the sprays dry. The more sprays and dusts that pile on a leaf, the greater the chance there is for leaf damage. Don't cover you plants with everything you have in the shed.
21
Plant Cool Weather Crops too Late and Don’t Plant Again in the Summer for Fall
Cool weather crops enjoy soil temperatures around 50 degrees and ambient temperature in the 60's, generally speaking. When soil temperatures rise, cool weather crops, tend to want to bolt and flower and they won't produce as we wish. It is important for them to be planted when they have several months of the right temperatures. In many garden, these temperature are present in the spring and fall. Don't forget to plant your cool crops a second time in the fall.
22 Pay Way too Much for Bagged Soils
Bagged soils are all basically the same and they are the most expensive way to fill your gardens. They (99/100) are all peat moss based and have some fertilizer. Bagged soil increase in price as more peat moss is added. You can make your own, by buying a bale of peat moss, which is much less expensive and simply mixing it with your native earth. A good basic mix is 50% peat moss and 50% your earth. I also recommend checking out local landscape companies and see what products they offer. A truck load of amended soil is much cheaper than bagged products.
23 Pay Way too Much for Bagged Fertilizers and Give Plants too Much TLC
Many granular fertilizers are made from the same basic ingredients which include bone meal, blood meal, chicken manure, feather meal and other animal wastes. Fancy bags of fertilizer make it sound like there is amazing stuff in their bag. Don't be fooled. Read the ingredients and remember that plants just need nitrogen, phosphorous, and potassium in great quantity than other nutrients. I recommend paying $1- $1.50 per pound for bagged fertilizer. Anything more is just a waste of money. We can get fooled into over loving our plants and thinking we need to do more. With experience, you will realize compost does it all and you don't really need to buy anything. Since we can't all make compost, just buy products wisely and don't over spend.
24 Don’t Fully Understand Cautions and Warning like Chemical Fertilizers and Turning Soil
There are lots of partial truths related to gardening. Like chemical fertilizer are toxic to soil life. They are, if over used and abused on mass scale. They won't harm anything if used lightly 1 or 2 times a month or occasionaly for emergencies. You may not need them at all or choose not to use, but don't fear them. Our budgets vary and our access to products vary, so you many need a chemical feretilzier. Remember all things on the planted are chemicals.
Learn about and don't fear gardening cautions and warnings. You will hear turning soil with shovel kills soil life and worms. It may harm a few but it won't kill out life to any degree of concern. You will hear pressure treated lumber leaches toxins. Well 20 years ago they were pressure treated with arsenic and now they are treated with copper. Yes, some copper can leach but not to a degree that would harm us. In fact, the amount of copper a plant would have to absorb from leaching, to harm us, would have long killed off the plant at lower absorption levels. Plants are more sensitive to copper than we are. So while there is truth to every one these examples, learn about them and don't fear them.
25 Don’t Start Composting Soon Enough and Don’t Collect Leaves
Not everyone can compost but when you have space and yard resources, get started. Often gardeners over think the process of composting and want to get it right. All you need to do is pile organic matter and let it decompose. Putting leaves in a basic pen is a great way to get started. Leaves breakdown wonderfully. Continue this process year after year and you will have more compost than you can use. Don't wait on starting composting and making piles. Just start them.
Nearly 500,000 Subscribers and Over 1250 Garden
Videos Designed to Quickly Present Information!
Visit The Rusted Garden Seed and Garden Shop for your Seeds, Starting Supplies,
Fabric Pots, Neem Oil,
Peppermint and Other Oils, Calcium Nitrate and More.
The Rusted Garden Seed and Garden Shop