FB HEADER

Search The Rusted Garden Journal: Just Enter a Key Word or Phrase

Saturday, October 29, 2016

Growing Organic Garlic in Containers and Earth Beds: Fall Planting

Growing Organic Garlic 
in Containers and Earth Beds: Fall Planting
Gary Pilarchik (The Rusted Garden)

Gary Pilarchik (The Rusted Garden)
There are two general categories for garlic and they are either softneck garlic or hardneck garlic. I recommend you do a search for zone planting of garlic and it will tell you which garlic type is best suited for your area. I am in Maryland Zone 7 and my zone is kind of like the buffer zone for both types. As you go more north, you would look to grow hardneck varieties. As you go more south you would look to grow softneck varieties. I grow both.

The key to planting garlic in the fall is to plant when the cool fall weather arrives and stays. You want your garlic to establish a strong root system over the fall but not grow lots of green growth. If you plant it when it is too warm, it will send up green shoots. Some green growth is fine. When the nights in your area start to stay in the 50's that is a great time to plant your garlic. I plant mine in late October. When you see the tree leaves turning colors... get your garlic in the ground.

Garlic should be planted in loose well draining soil. It doesn't like to sit in damp earth as it creates disease issues. The planting depth will vary between 2 inches to 6 inches as you want the cloves to be planted below the freeze level of the ground. I plant mine, in containers, at a 6 inch depth as containers freeze more deeply during my winters. I plant them 4 inches deep in my earth beds as the earth holds heat better. The ground beds get about an inch of freeze during our coldest months. You can also put several inches of straw or mulch on your beds to insulate the ground. Just remove it come spring. That is a great tip for more northern zones. This is how I plant garlic in my containers.


I use a balanced 5-5-5 (or close to that as I buy what is on sale) organic fertilizer for most of  my garlic and most of my vegetable plants. That is 5 (N)itrogen-5 (P)hosphorous-5 (K)/Potassium which is your N-P-K values. You really don't need more than that for most vegetables. However, fertilizers vary greatly. Try and stay in the middle of a 1-1-1 and a 10-10-10. The numbers do not need to be balanced. This is just a guideline. In fact for bulb development phosphorus is really important. While a 5-5-5 will work just fine to establish the bed or container, I like to boost mine with Bone Meal which is a 2-14-0 fertilizer.  The high phosphorous helps bulb growth.

The earth bed garlic video will detail the fertilizers. Don't stress about it. Just use this as a guideline. Come spring you want to feed your garlic with a water soluble organic fertilizer and try to find one that has a higher P or phosphorous value over N or nitrogen. You want bulb growth and not leaf growth in the case of garlic.

Spacing is pretty simple. I plant the cloves 4-6 inches apart based on the size of the bulb development when mature. If in doubt stay at the 6 inch spacing. And remember, you are not planting a whole garlic bulb but a portion of it called the clove. Row spacing, I keep the same at 4-6 inches. Although some people recommend 8-10 inches between rows, I have not found the value in giving up the extra space. You'll notice in the videos that  my container garlic gets planted more closely together. That will inhibit, to some degree, the bulb size but you can help off-set that with extra water soluble feedings.


You don't really need to water the garlic cloves in at planting as the weather is cool. Watering it twice a week is plenty come the warming end of spring. Watering is more important for container garlic then earth bed garlic. If you notice buds on the tips of your garlic growth as summer approaches, remove them. You don't went energy going into flowering/scapes. Garlic, in my zone, is ready to harvest come mid to late June. The green growth will brown and fall over.  Now I like to pick some early. I use it in salad dressings and in cooking.  I even use the leaves in scrambled eggs.

You can purchase your garlic on line. It is a great way to find different varieties of softneck and hardneck garlics suited to your taste desires and planting zone. Garlic from grocery stores can be used. I have used it for years. Even if your garlic fails to a degree, you will get a bulb of some size and be able to use it your kitchen. Just plant a bulb and give it a try! You only learn by doing.


Good Luck with Your Garden,
Gary (The Rusted Garden)

Join My New YouTube Channel Just for NEW Gardeners: My First Vegetable Garden

Join My FB VIDEO Page - :The Rusted Garden FB Videos

Join My FB DISCUSSION Group - :The Rusted Garden: All About Vegetable Gardening

Saturday, September 10, 2016

Cool Season Vegetable Crops (Spring & Fall): Facts and Planting - Revised 2016

Cool Season Vegetable Crops (Spring & Fall)


A  Mix of Cool Weather Vegetables: The Rusted Garden


Please Visit The Rusted Garden Vegetable Seed and Garden Shop

What Makes A  Vegetable a Cool Weather Vegetable?
The cell structures of vegetables differ in that some vegetables have plant cells that will burst if they freeze or encounter even a light frost.. Cool weather vegetables tend to have the ability to freeze without cell damage. They are designed for the cooler temperatures. The cells can freeze and defrost in the sun with out damage to the plant leaf. When a extend cold comes that will freeze the roots or area where the roots meet the stem, that is when the plant usually dies or is damaged. So you have a lot of time to grow cool season vegetables!


Fully Frozen and Survived: The Rusted Garden

Cool season vegetables prefer the cooler weather. This group of vegetables grows best and tastes their best with 50 degree (F) nights and 60-70 degree (F) days. Cool weather vegetables can be broken into two sub-categories which are Hardy and Semi-Hardy.

Why Can’t I Plant Them When It Is Hot??
Many of the cool weather vegetables try and set seed when it gets warm. Lettuces, for example, don’t mature to full heads and grow quickly to flower and set seeds when the warmth comes. This is aprocess called ‘bolting’. Most lettuces will also become bitter tasting when it is get regularly warm.

Radishes become woody and also ‘bolt’. The cool weather allows vegetables time to mature slowly and it inhibits (slows) the ‘bolting’ process. Kale is a hardy cool weather crop that tastes sweeter when‘cool grown’ but it can be grown through the whole season in many locations.

Hardy Cool Weather Vegetables: 
This group of vegetables can manage well with mid 40 degree days and can survive a strong frost. Many vegetables in this group can over-winter in your garden and bring you early spring greens. Vegetables in this group can be planted up to 4 weeks before the average last frost date in your area. You can probably even get away with 6 weeks if you like pushing garden limits.

Semi-Hardy Cool Weather Vegetables: 
This group of vegetables doesn’t fare as well with frost although they can handle a light frosting with minimal to no damage. They prefer daytime temperatures in the 50’s and nights that don’t fall below 40 degrees, although they can handle nights in the 30’s. Vegetables in this group can be planted up to 2-4 weeks before the average last frost date in your area.

A Cool Weather Tip
In places with warm to hot summers, you actually have two cool weather seasons. I plant in Maryland Zone 7. I can start my cool weather planting March 1st and I can plant them again mid August for a fall cool season. I actually plant at this time to also establish vegetables that I will let over-winter.

Different Types of Cool Weather Vegetables

The exact split, between hardy (H) and semi-hardy (SH), and where to place a vegetable in the sub-categories is debated. It is best used for general planting guidelines and understanding they simply like the cool weather. My guidelines for each vegetable is based on my growing area (Zone 7). I am giving you the general range for first planting of these vegetables. You can plant successive crops every 2 weeks as you wish based on you planting zone.


Some Cool Weather Vegetable Crops: The Rusted Garden

Asparagus (H) (Perennial) It takes about 3 years to establish a viable crop. It is a perennial plant that will start sending up stalks in March when planted the previous year. If you are planting it for the first time to establish it your garden, it is best to use transplants. You can grow them from seed in cell trays. They should be planting in the garden in May.

Arugula (SH) It can be started indoors and planted in the garden 2 weeks before last frost date. You can also plant seeds at the same time.

Beets (SH) It can be planted as seeds 2 weeks before last frost date. I have had success growing transplants.

Bok Choy (Pak Choi) (H) It can be planted as seeds directly in the garden 2-4 weeks before last frost date. I do recommend growing it indoors and transplanting it into the garden 2-4 weeks before last frost date.

Broccoli (H) It is best planted as a transplant 4 weeks before last frost date. I would not recommend starting it as seeds in the ground in Zone 7.

Brussels sprouts (H) It is best planted as a transplant 2 weeks before last frost date. I would not recommend starting it as seeds in the ground in Zone 7.

Cabbage (H) It is best planted as a transplant 4 weeks before last frost date. I would not recommend starting it as seeds in the ground in Zone 7.

Carrots (SH) Carrots should not be grown as transplants. They can be seeded in your garden 2-4 weeks before last frost date.

Cauliflower (H) It is best planted as a transplant 2-4 weeks before last frost date. I would not recommend starting it as seeds in the ground in Zone 7.

Celery (SH) It is best planted as a transplant 2 weeks before last frost date. I would not recommend starting it as seeds in the ground in Zone 7.

Cilantro (H) It can be planted as seeds directly in the garden 2-4 weeks before last frost date.

Collard Greens (H) It can be planted as seeds directly in the garden 2-4 weeks before last frost date. I do recommend growing it indoors and transplanting it into the garden 2-4 weeks before last frost date.

Fennel (H) It can be planted as seeds directly in the garden 2-4 weeks before last frost date. I do recommend growing it indoors and transplanting it into the garden 2-4 weeks before last frost date.

Kale (H) It can be planted as seeds directly in the garden 2-4 weeks before last frost date. I do recommend growing it indoors and transplanting it into the garden 2-4 weeks before last frost date.

Kohlrabi (H) It can be started indoors and planted in the garden 2 weeks before last frost date. You can also plant seeds at the same time.

Lettuce (H) It can be started indoors and planted in the garden 4 weeks before last frost date. You can also plant seeds at the same time.

Mustard Greens (H) It can be planted as seeds directly in the garden 2-4 weeks before last frost date. I do recommend growing it indoors and transplanting it into the garden 2-4 weeks before last frost date.

Onions (H) If you are using bulbs you can plant them 6 weeks before last frost date. I have not used seeds.

Parsley (H) It can be planted as seeds directly in the garden 2-4 weeks before last frost date. I do recommend growing it indoors and transplanting it into the garden 2-4 weeks before last frost date.

Peas (SH) They should be planted directly in the ground 4 weeks before last frost date. Peas do not like soggy cold soil.

Potatoes (SH) They should be planted directly in the ground 4 weeks before last frost date.

Radishes (H) They should be planted directly in the ground 4 weeks before last frost date.

Spinach (H) It can be planted as seeds directly in the garden 2-4 weeks before last frost date. I do recommend growing it indoors and transplanting it into the garden 2-4 weeks before last frost date.

Chard (SH) It can be planted as seeds directly in the garden 2-4 weeks before last frost date. I do recommend growing it indoors and transplanting it into the garden 2-4 weeks before last frost date.

Turnips (H) They should be planted directly in the ground 4 weeks before last frost date


More Cool Weather Vegetable Crops: The Rusted Garden

Good Luck with Your Garden,
Gary (The Rusted Garden)

Join My New YouTube Channel Just for NEW Gardeners: My First Vegetable Garden

Join My FB VIDEO Page - :The Rusted Garden FB Videos

Join My FB DISCUSSION Group - :The Rusted Garden: All About Vegetable Gardening

Thursday, August 25, 2016

Squash & Zucchini (Pests/Pollination) Grow It, Cook It, Eat It - A Garden & Cooking Series E- 3

Squash & Zucchini (Pests/Pollination)  
Grow It, Cook It, Eat It - A Garden & Cooking Series E- 3


Coley and I are excited to present our 3rd episode of Grow It, Cook It, Eat It. You can find the recipe and other garden links below.

This episode is all about Squash and Zucchini. Coley presents 5 tips on cooking and storing the vegetables which includes Zoodles. I focus on pollination and why fruit browns. I also talk at length about identifying and controlling squash bugs, beetles and vine borers. I grow my S & Z up cages and supports for easy spraying. And most importantly, don't forget to eat what you grow and cook, with your family and friends!

Cheers!
Coley and Gary


Good Luck with Your Garden,
Gary (The Rusted Garden)

Join My New YouTube Channel Just for NEW Gardeners: My First Vegetable Garden

Join My FB VIDEO Page - :The Rusted Garden FB Videos

Join My FB DISCUSSION Group - :The Rusted Garden: All About Vegetable Gardening

Tuesday, August 2, 2016

Growing Tomatoes and Peppers From Start To Finish: A 9 Video Garden Series


Growing Tomatoes and Peppers From Start To Finish

Please Visit The Rusted Garden Vegetable Seed and Garden Shop


Growing Tomatoes

This is a 9 part series I just finished and it is hosted on one of my two garden YouTube Channels - My First Vegetable Garden. It holds nearly 200 garden videos for new gardeners.

The 9 videos take you from seed starting tomatoes and peppers to hopefully a wonderful harvest. In between you can find all the steps on planting, feeding, tending and manage pests and disease.

I've included all 9 videos on this page with their video descriptions. If you enjoy this series please check out my channel linked above.

Growing Peppers

(1 of 9) Growing Tomatoes and Peppers: 
When to Seed Start,  Starting Mix, Light, Watering and Feeding

This is a 9 part series that takes you from seed starting to picking tomatoes and peppers. The 1st video shows you how to seed start your tomatoes and peppers indoors. I show you how to prepare the starting mix, how to prevent fungus and insects, when to fertilize, how and when to water and a bit about lighting. And I tell you when to start them. This is a series you can follow to grow your own tomatoes and peppers. Makes sure you have annotations on as I add information in text boxes.


(2 of 9) Growing Tomatoes and Peppers: 
Acclimation (to Sun), Fertilizing and Cup Transplanting Peppers

This is a 9 part series that takes you from seed starting to picking tomatoes and peppers. This is the 2nd video.  I shows you how to transplant the peppers into cups in 3 ways and how to fertilize them. I also talk about acclimating them to the sun.  This is a series you can follow to grow your own tomatoes and peppers.


(3 of 9) Growing Tomatoes and Peppers: 
True Leaves and Fertilizing, Purple Stems and Cinnamon Anti-Fungal

This is the 3rd video in a 9 part series about growing tomatoes and peppers from seed starting to harvesting. This video shows you when to fertilizer your tomato starts (1st True Leaves) and discusses water soluble fertilizer and how much to use. I give you an update on the pepper transplants, talk about purple pepper stems, how to use neem oil for insects, cinnamon as an anti-fungal and the way I label my seedlings.


(4 of 9) Growing Tomatoes and  Peppers: 
Cup Transplanting Tomatoes, Fertilizing, Stem Bumps and Tips 

This is the 4th video in a 9 part series about growing tomatoes and peppers from seed starting to harvesting. I show you how to transplant the tomatoes into cups and talk about fertilizing. I also show you some over-grown tomatoes in starter cells that are doing well from processed fertilizers. The tomato stems have bumps, this occurs on many stems and it is nothing to worry about. Make sure you have annotations on. There are lots of notes.


(5 of 9) Growing Tomatoes and Peppers: 
Pruning Peppers, No Flowering, Feeding and Progress

This is the 5th video in a 9 part series on growing tomatoes and peppers from start to harvesting. This video quickly explains why you would and how to prune peppers. It is a great way to get stronger more productive plants.. Feed your tomatoes ever 10-14 days with a water soluble fertilizer and don't let them flower while you wait for final transplanting.


(6 of 9) Growing Tomatoes and Peppers:
Pepper Planting, Container Soil, Basic Feeding and Tomato Progress

This is the 6th video of 9.  Peppers and tomatoes like the warmth and generally like to be planted when the nights are in the 50's and the days are in the 70's.  Too much nitrogen grows a lot of pepper leaves. While tomatoes love to be fed, a bit less for peppers is better. I talk about some basic fertilizing principles and how to make a basic container soil. I also show you how to plant your peppers in containers and in earth beds. Tomatoes show up in the video to but they will be the star of the next video.


(7 of 9) Growing Tomatoes and Peppers:
Prevention, Splash Barrier, Aspirin and Sprays, Planting

In video #7 I talk about disease prevention. Mulch is used for moisture and weeds but also as a disease splash barrier. Bottom pruning leaves helps create a disease barrier. Slugs are treated with Iron phosphate and I plant my indeterminate tomatoes. Finally I talk about Aspirin spray (which really works) for bolstering you tomato plant's defenses. Baking soda makes a great anti-fungal.


(8 of 9) Growing Tomatoes and Peppers:
Side Dressing, Pruning, Suckers, Removing Leaves and Sprays

Video #8 of 9 gets your tomatoes and peppers ready for growth and production. I show you how I remove bottom leaves from my peppers and talk about fertilizing them. They don't need much. I also show you how I stake, prune and remove suckers from tomato plants. I explain what a production stem is and discuss why you may want to manage stems on your tomatoes. I also show you how to side dress tomatoes with fertilizer and lime.


(9 of 9) Growing Tomatoes and Peppers:
My Harvest, Saving Tomato and Pepper Seeds, Final Tour

Thanks for watching this series: Growing Tomatoes & Peppers. This is the final video of the series. I show you my harvest, how to save tomato and pepper seeds (for next year!) and give you my final tour of the tomato and pepper gardens.


Good Luck with Your Garden,
Gary (The Rusted Garden)

Join My New YouTube Channel Just for NEW Gardeners: My First Vegetable Garden

Join My FB VIDEO Page - :The Rusted Garden FB Videos

Join My FB DISCUSSION Group - :The Rusted Garden: All About Vegetable Gardening

Saturday, July 16, 2016

The Difference Between Determinate & Indeterminate Tomatoes


The Difference Between 
Determinate & Indeterminate Tomatoes

Please Visit The Rusted Garden Vegetable Seed and Garden Shop

There are generally two types of tomato plant categories. A tomato plant is either a determinate plant or an indeterminate plant. You may come across tomatoes called semi-determinate, however, you can treat them as a slower growing indeterminate tomato plant variety.

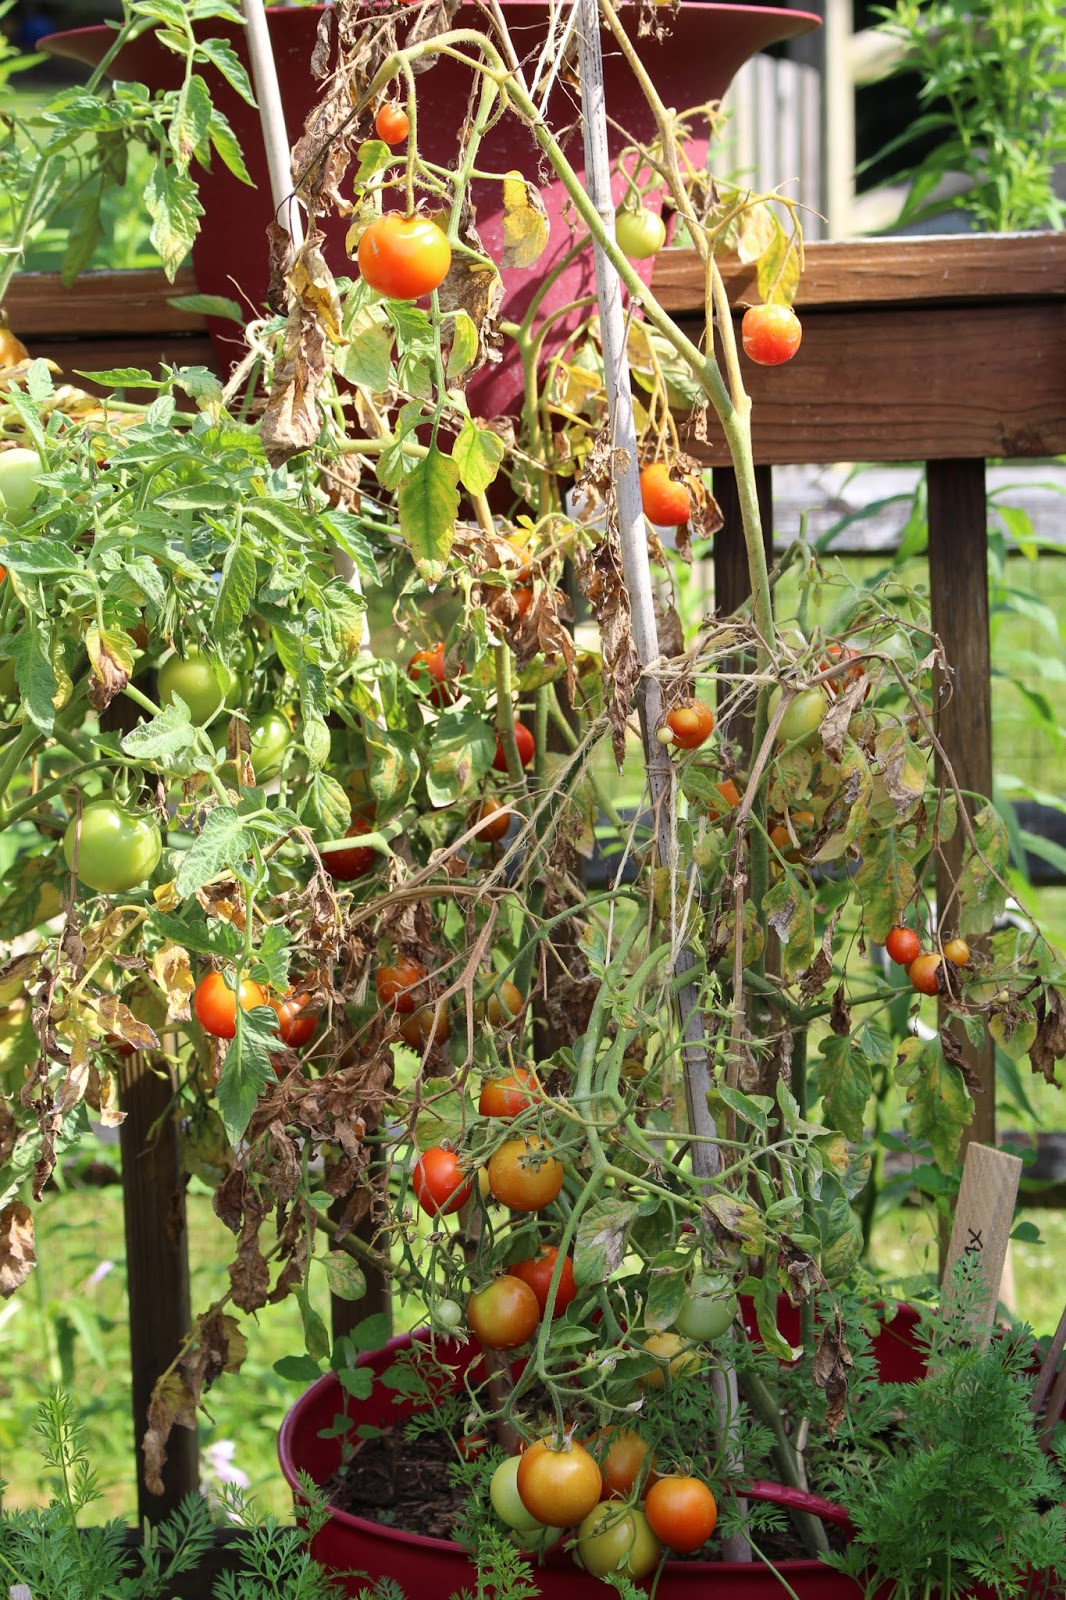
Clusters of  Determinate Tomatoes
Ripen Together for a Large Harvest
Determinates Mature Together
A determinate tomato grows to a set height and stops growing or greatly slows growth. They may be anywhere from 1-5 feet tall.

The determinate variety tomatoes tend to set all of their flowers over a very short period of time.

You will often see clusters of  green tomatoes that seem to appear all at once. They also tend to ripen together quickly, be ready for a large harvest.

The determinate plant typically begins to die off while the fruits are in the later stages of maturing.  Often, while the fruits mature, you will notice the plant leaves yellowing and dying off. This is a normal process for the plant.

Determinate types of tomatoes are great for getting early tomatoes from your garden and they do well in containers and in small spaces. You can often plant two rounds of determinate tomatoes in your garden, where you have about 5 months of warm weather. They can be planted in May and again in mid July.

Staked Indeterminate Tomatoes
The indeterminate tomato variety continues to grow and grow until frost or disease takes the plant. These plants can easily get to 6, 7, 8 feet tall and even taller. It will set flowers and fruit throughout the entire growing season. Typically, it produces several leaves, a cluster of flowers, several leaves and a cluster of flowers. This general pattern repeats, as tomatoes are vines.

Only frost or disease will stop an indeterminate tomato from growing and setting new flower clusters.  Think of it this way, a determinate tomato grows to a predetermined size and stops. Indeterminate tomatoes often need to be staked and pruned to manage their vigorous continuous growth.

Flower Cluster Form Tomatoes Over the Whole Season


A 'Sucker' in the Joint About to Be Pruned Out


I recommend slowly pruning the bottom leaves of indeterminate tomatoes and removing some suckers over the growing season. Pruning helps with airflow around and through the plant and it is done to help manage diseases and excessive growth. When and how much to prune is the gardener's choice.

You can often find out whether or not your tomato plant is an determinate or indeterminate plant variety from the seed pack. If you happen to buy a transplant or can't find what type it is, search the name on the internet. Very often you will find seed companies that carry your tomato variety and the plant description will tell you what type of growth to expect.

Tomatoes form from the bottom up on indeterminate plants. The lower part of the plant holds older tomatoes that mature and ripen. New flowers and tomatoes are found toward the top of the plant, as it grows.

The 'suckers' that form in the joints of leaves and stems will also produce flowers and continue to grow. Indeterminate plants are often pruned to limit production while determinate tomatoes should rarely be pruned.

Pruned and Staked Indeterminate Varieties
A Cluster of Green Tomatoes Mature 

Indeterminate Varieties Set Fruit Over the Season


Good Luck with Your Garden,
Gary (The Rusted Garden)


Join My New YouTube Channel Just for NEW Gardeners: My First Vegetable Garden

Join My FB VIDEO Page - :The Rusted Garden FB Videos

Join My FB DISCUSSION Group - :The Rusted Garden: All About Vegetable Gardening